Have you ever had the need to work on Integration or End-to-end (E2E) tests for a Single Page Application made in Javascript that uses a remote backend API? In this blog post, we are going to set up from scratch our Cypress 11 test suite using the Cucumber (Gherkin) syntax and mocking some of those external API requests to ensure stability, reliability, and certainty in our integration tests.
Most of us know, that if we want to live a great life, we should find a way to enjoy the process and not get so focused on the result.
Quick and instant results
In the driven and ambitious society that we live in, everything we do seems to be measured by the instant results and media shows (TikTok, YouTube Shorts, Instagram Reels, etc.). No longer, are the days when we were taught to work hard, stay consistent and be patient, to reach some level of success. Now it seems those principles are slowly going obsolete.
Working at a Startup
However, I also know how it is to work for a small startup with little resources— or that it is growing at fast pace, and that whose customers want and need a new functionality for yesterday or tomorrow at least… For those of us that have little time to look into evaluated options, analysis, comparison, and research on the best way to add integration/e2e/system tests for our Single Page JavaScript Applications… For all those of you, I am sharing our current implementation, so you can start copying and pasting right away 😉.
Project details and use case
Before jumping into the language, technology, and setup, should we look into the use case and project details that our team is using this architecture for?
What kind of project are we talking about?
In a few words, it is a Single Page Application portal, tightly integrated with an external data source (Microsoft Dynamics 365), and which we utilize to manage different entities by making CRUD requests on demand.
SSO authentication
Some additional details would be that this application uses Single Sign On through a custom SSO provider (similar to Google SSO or Github.com SSO). To make some validations in the backend, we built a Ruby on Rails Application that handles authentication, generates tokens and serves as a layer of protection for the CRM and any other third-party connections. So, only the React application knows the basics to interact with those external services.
Probably, a similar product that is public and, in fact, we utilized as a part of our Agile management process is a service called ZenHub.com.
In a nutshell, the architecture that we decided to follow for our Single Page Application test suite looks like this:
- Uses JavaScript as the main language
- Stubs/mocks/intercepts third-party and external requests
- Uses the Gherkin syntax (Cucumber)
- Uses Cypress as the main tool for the End-to-End(e2e) tests and JEST for unit testing.
So, once we are done with the setup, we should be able to either:
-
Run your tests locally in the headless mode(without opening a Browser)
npx cypress run
-
Run them visually in the browser
npx cypress open
If you are using Circle Ci as your Continuous integration server, it would be as easy as using this configuration file to run your tests there as well (here we are also running our unit tests using JEST).
Running Cypress with Gherkin(cucumber) on CircleCi
.circleci/config.yml
Beginning with the Cypress with Gherkin(Cucumber) setup
So, let’s begin with the setup of Cypress with Gherkin.
You should be able to install Cypress 10 or 11 by using yarn or npm
yarn add cypress --dev
# or
npm install cypress --save
For the pre-processor and dependencies associated, you can install them all by running these commands:
npm install @bahmutov/cypress-esbuild-preprocessor @badeball/cypress-cucumber-preprocessor esbuild --save-dev
# or
yarn add @bahmutov/cypress-esbuild-preprocessor @badeball/cypress-cucumber-preprocessor esbuild --dev
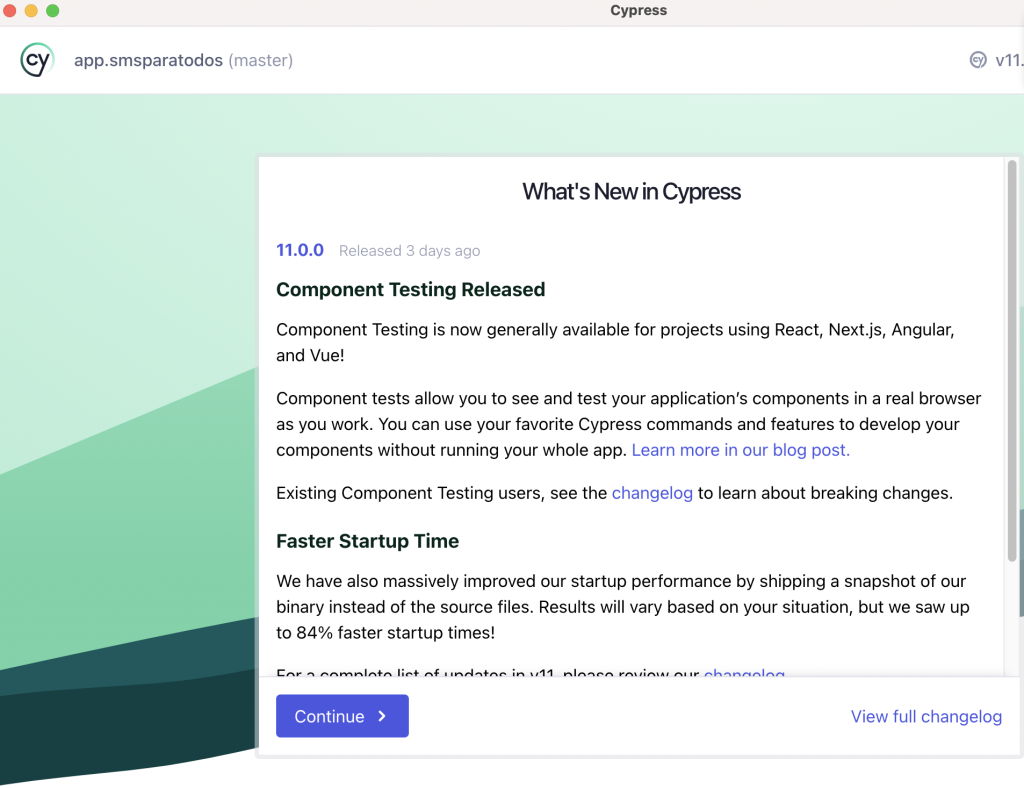
Once you are done with the installation of new dependencies, let’s open the Cypress panel, so we can configure it properly. In order to achieve that we can open the panel with Cypress by running this command:
npx cypress openThe first time you open Cypress you will need to configure some basic stuff for your e2e tests, and it might look like this:
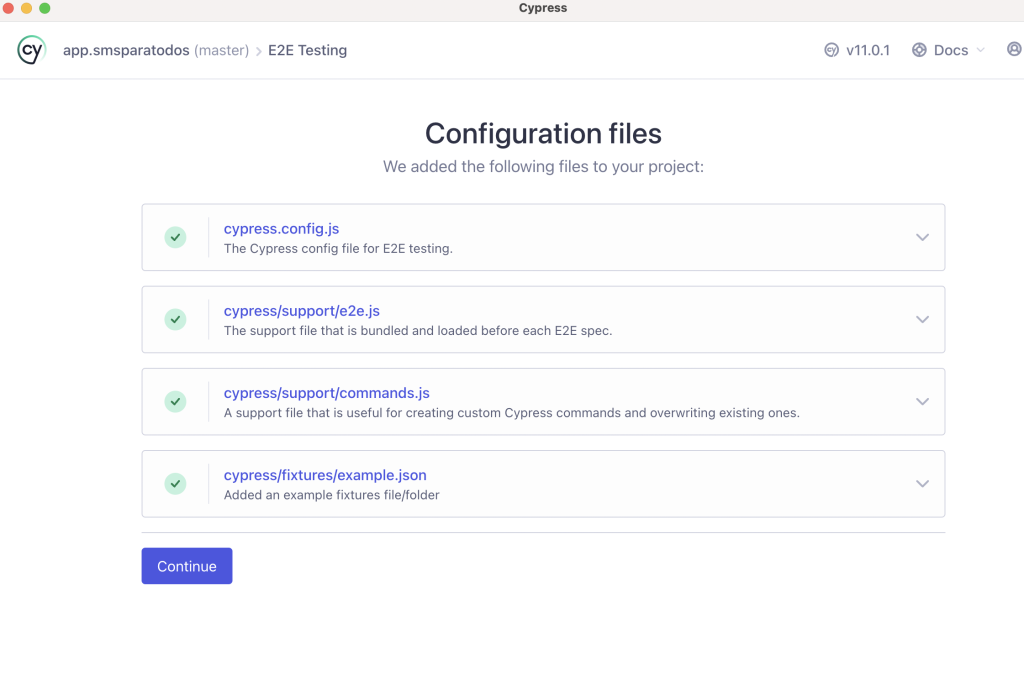
And, after, you click on continue…
Cypress after you click on continue
Now, let’s go with the default values here.
In my case, I will use Chrome and start the E2E testing.
Then you might see this page:
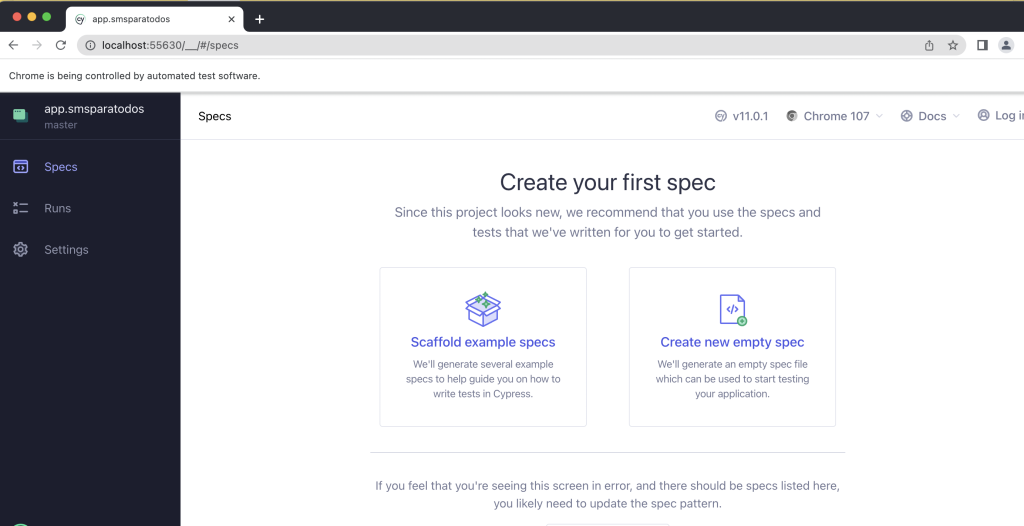 cypress setup 4 create your first spec
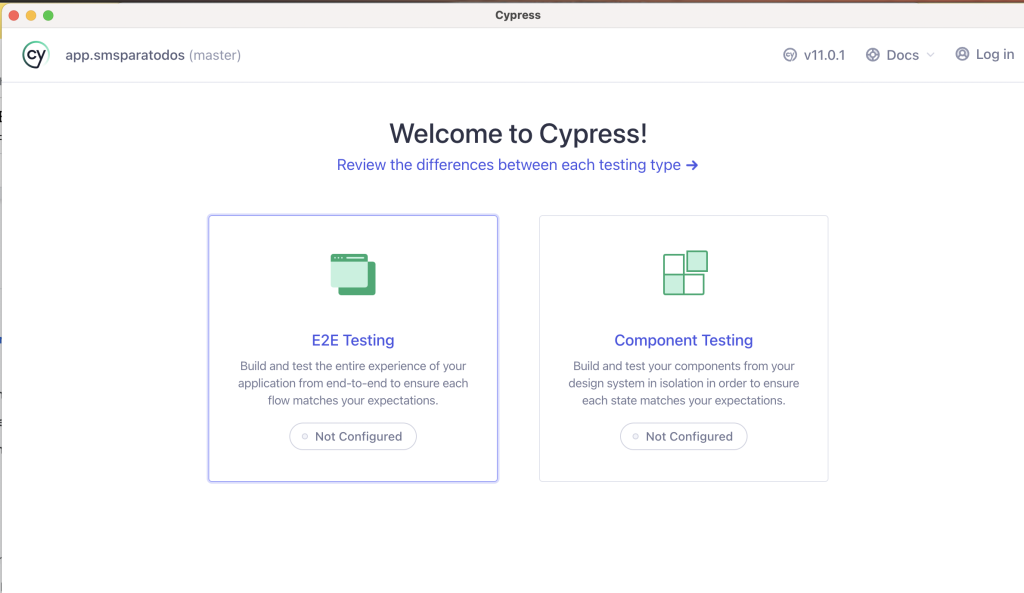
By the way, the next time you open the Cypress client.
You would see a different Welcome page:
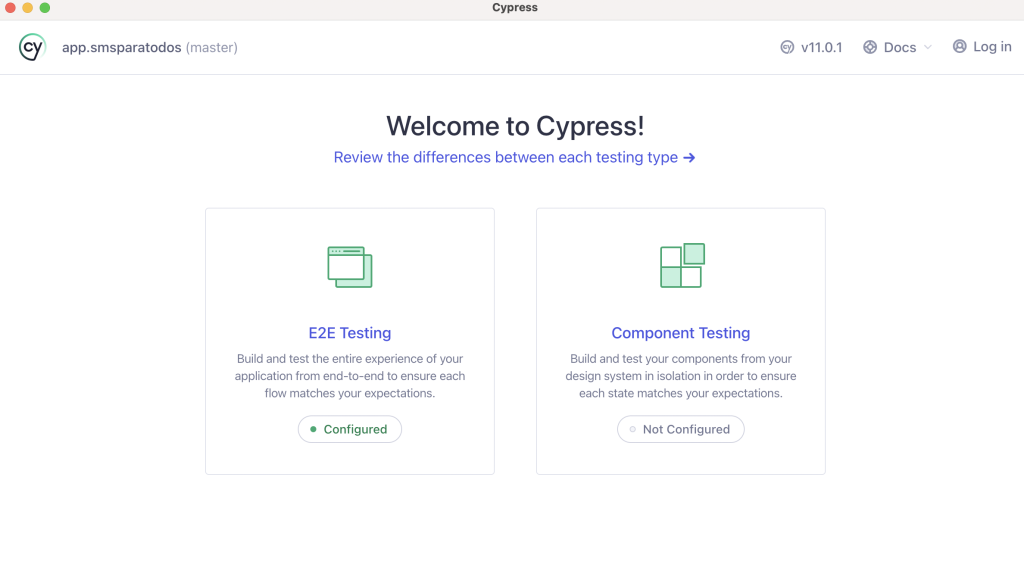
cypress setup 5 next time you open the client
As we are planning to use the Gherkin syntax, let’s work on that.
At this point, if you are using git on your repository, these are the changes you might see if you do agit status in your terminal:
We would see that some additional files were created:
- cypress/support/commands.js
- cypress.config.js
- cypress/support/e2e.js
- cypress/fixtures/example.json
And your package.json should include the following new dependencies:
In the next steps, we are going to modify some of them.
We need to define where our steps definitions would be located, in our case, we are storing them in the folder cypress/e2e/step_definitions/
Let’s create the file .cypress-cucumber-preprocessorrc.json
touch .cypress-cucumber-preprocessorrc.jsonwith the following content:
And the most important configuration file for Cypress is cypress.config.js, and we can override it with a configuration like this:
Now let’s create a few folders that we would need in subsequent steps:
- cypress/e2e/
- cypress/e2e/step_definitions
- cypress/e2e/features/
- cypress/fixtures/common/
So you can run this command and create them all
mkdir cypress/e2e/ cypress/e2e/step_definitions cypress/e2e/features/ cypress/fixtures/common/And as we are planning to place all the generic and easy to reuse steps in just one file initially, let’s create it:
touch cypress/e2e/step_definitions/common_steps.js And the content would look like this
As we are using some generic functions, let’s create a general purpose utils file where we can place some of them and that we can reuse in different places(DRY), I am going to call it cypressUtils.js we can place it within the cypress/e2e folder:
touch cypress/e2e/cypressUtils.jsThe content example would look like this:
Now, let’s begin to work on actual features and e2e tests.
Having a home or landing page is very common in many websites and Web Applications, and exercising that page would be a quick way to validate that our setup is working appropriately.
For that, we need to create a new .feature file, we can create it using the terminal
touch cypress/e2e/features/home_page.featureLet’s use some of the steps that we already defined in the common_steps definition file, so the content would look this way:
So, what’s next?
We need to run our example, and if we are still running the Cypress client, there is a chance that if you go there and see an error, please click the try again button, then you might see a message like this:
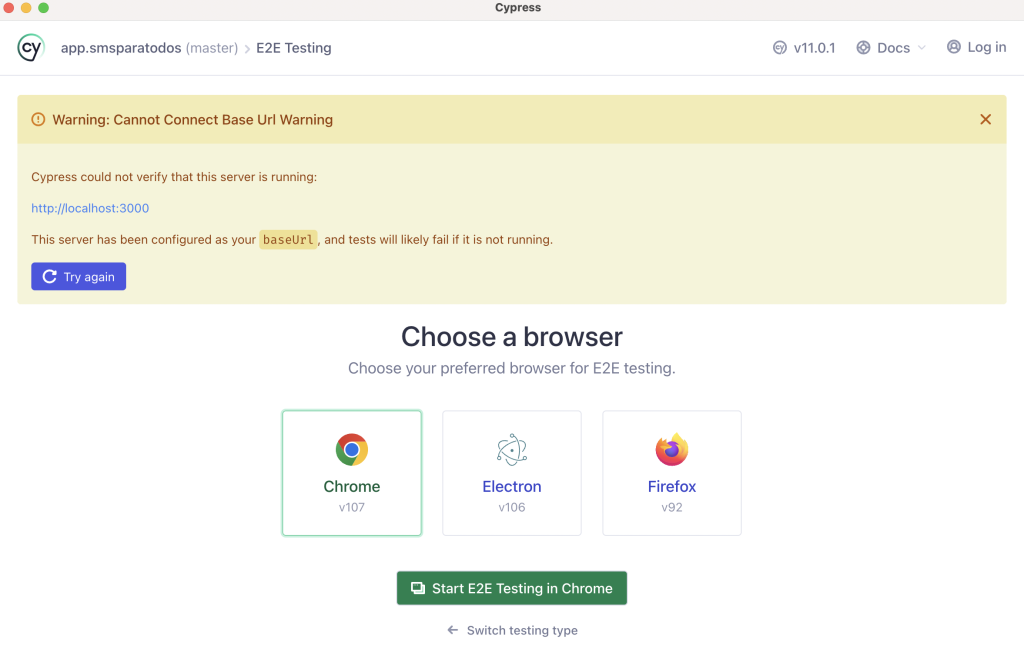
Cypress running your single page application
And the reason that you might see that warning is that you are not running your application, in our case, I would be running that with:
yarn start
# or
npm start
So once you fix that issue and your application runs in the right port (e.g. 3000).
Then Cypress should be able to see a new screen with the new feature file we just added.
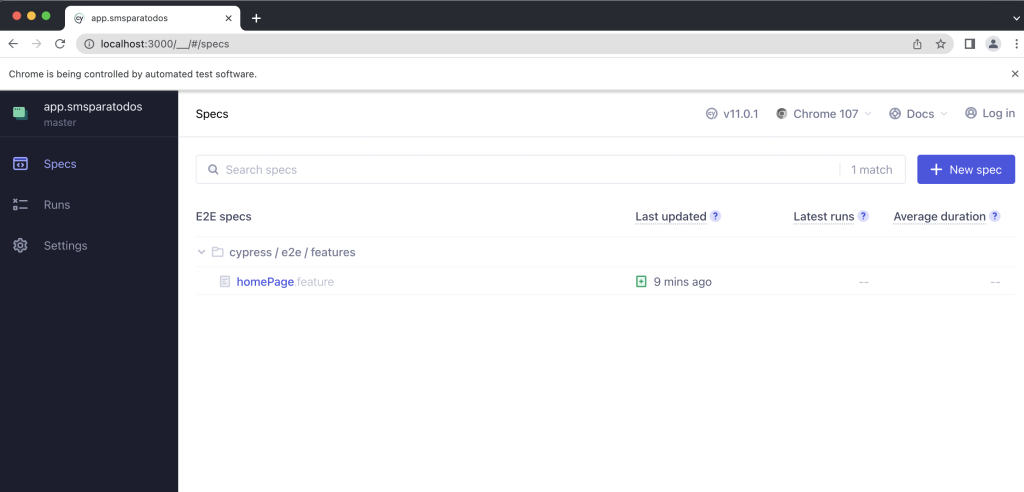
And if you click on that feature file, the test is going to run and access your Single Page Application, in our case it would look like this:
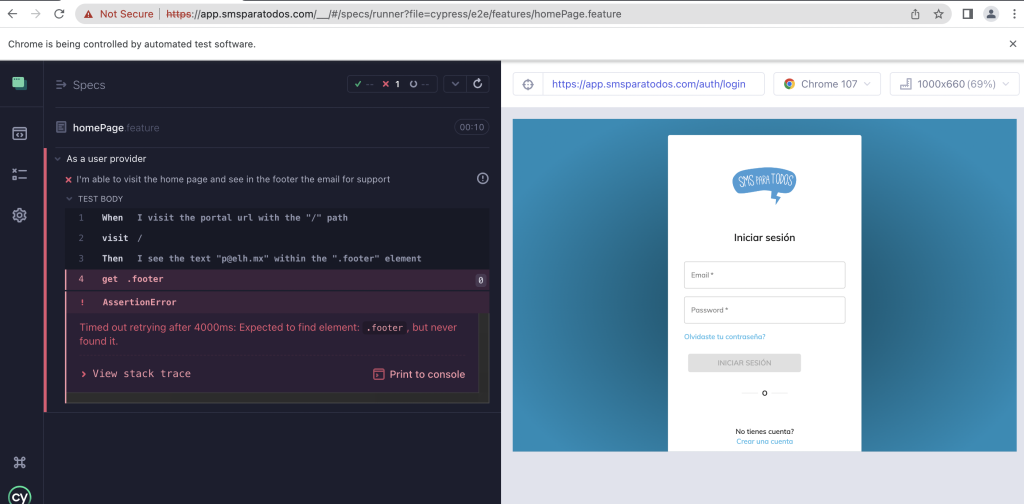
Cypress panel with a failing test
There you have it, you were able to implement your first feature End-to-End(e2e) using Cypress 11!!!
Should we test one that makes an actual HTTP to our API?
Sure thing, let’s do that.
Identify HTTP requests
First of all, we would need to identify the kind of HTTP requests we need to mock on that section and functionality. You can use the standard Google Chrome inspector in your application (no need to do it in the Cypress panel), so you can open your application and inspect in the Network tab and see some details about that HTTP request. For example, once you try to see what SMS notifications you have sent, you would see that two requests are made to the API in the Single Page Application, and they look like this:
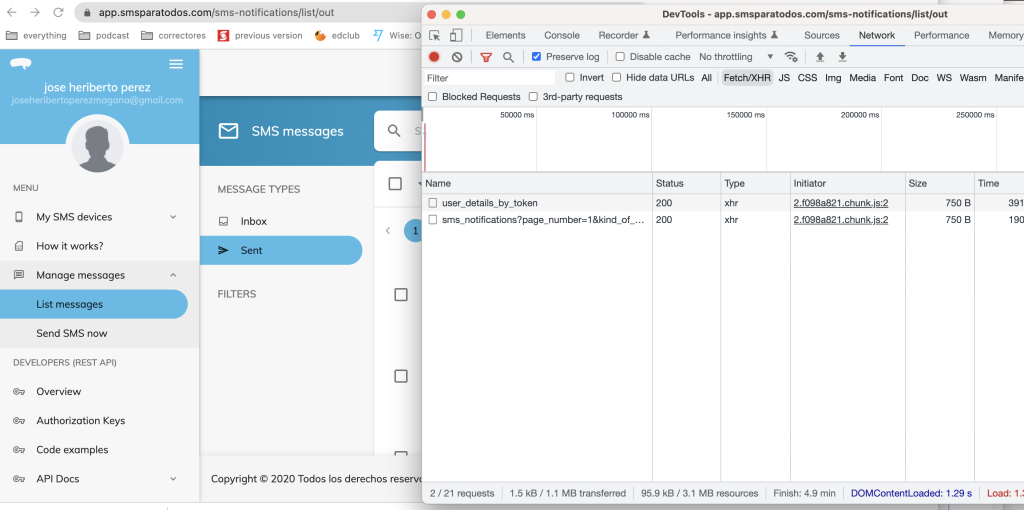
Identify http requests
And once you click in one of them:
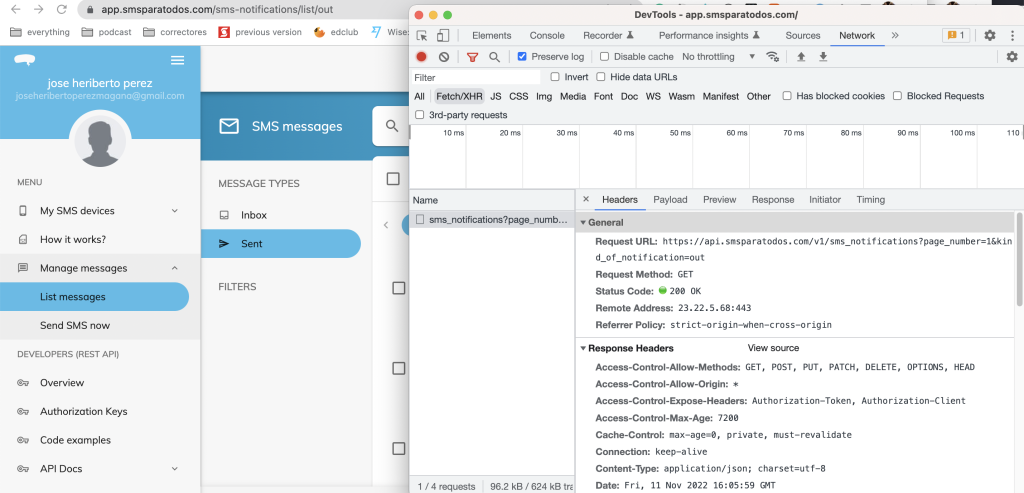
Identify http requests and response
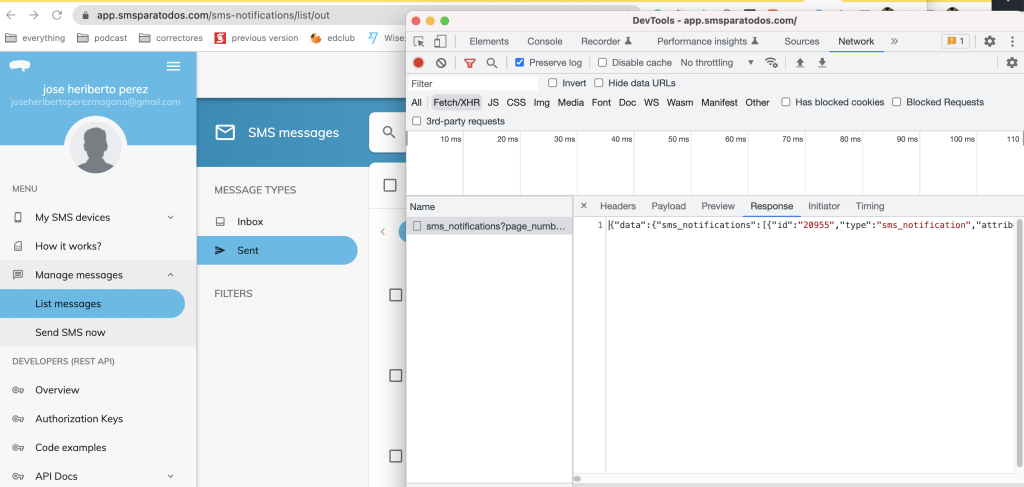
Identify http requests details with response
That way, you can get the expected response, then you can give it a nice JSON format and save it as a fixture to mock the HTTP request to that specific URL and you can do the same for all the requests that are performed in that section.
So, this is one of them in my application.
https://api.smsparatodos.com/v1/sms_notifications?page_number=1&kind_of_notification=out
I will be creating two fixture files, the first one is about the SMS notifications sent
touch cypress/fixtures/sms_notifications_out.jsonAnd the content would look like this
For the authentication part, it would be:
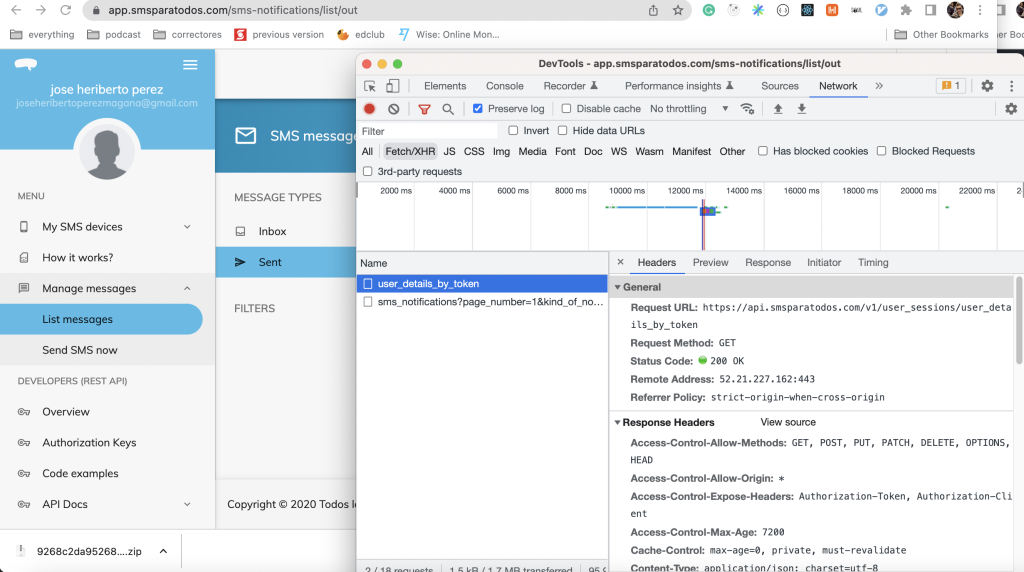
User details http request
The endpoint in question:
https://api.smsparatodos.com/v1/user_sessions/user_details_by_token
And the fixture file
touch cypress/fixtures/user_details.jsonWith a content example like this:
Now that we have identified the URLs and the response, we can work on the feature.
We can create a new .feature file with a name like this:
mkdir cypress/e2e/features/sms_notitications
touch cypress/e2e/features/sms_notitications/sent_notifications.feature
And the content would look like this:
At this point, if we run the new feature test by using the visual Cypress panel or by running the test in our terminal with:
npx cypress run --spec cypress/e2e/features/sms_notitications/sent_notifications.featureYou would be able to see that the SMS notifications are rendered correctly.
One important aspect to outline here is the step definition
Given I stub the user authentication in localStorageSo, what does that definition look like?
Well, it looks like this:
Given('I stub the user authentication in localStorage', () => {
  Step(this, 'I intercept the "sign_in" URL with "POST" method in the server and respond with the fixtureFile "user_details.json"');
  Step(this, 'I visit the portal url with the "/auth/xxxx/yyyy" path');
});
In our specific use case, for our Single Page Application, we created this special route in our React Application(using React Router), in the form of:
https://localhost:3000/auth/xxxxx/yyyyyIn development/test by visiting that URL, localStorage and sessions work great, no need to force/manage anything in the Cypress side, in the form of:
    cy.request({
      method: 'POST',
      url: 'https://api.smsparatodos.com/v1/user_sessions',
      body: { email: 'heriberto.perez@magmalabs.io', password: 'pass' }
    }).then(({ body }) => {
      window.localStorage.setItem(myTokenAuth, 'tokenAuth');
      window.localStorage.setItem(myTokenClient, 'tokenClient');
    });
And install an additional dependency such as:
cypress-localstorage-commandsUsing the URL that sets the session and local storage on the React Application(available for test/development only) would allow you to run your tests in headless mode or visual mode without having trouble with sessions or local storage between pages and reloads.
If you want me to expand on that topic, please let me know.
By the way, if you want to build a new SPA in React and you are not sure about how to architect your new application you can also read this blog post series called:
Defining our 2023 architecture regarding frontend React applicationsHere is the first part of it.
Cheers!
All right! Are we done? Yes, that is it for now. But, if you are interested in the journey and process in order to come up with this solution, please let me know in the comments, as I have a draft on the journey and a bunch of analysis, comparison, and discussions in order to choose this technology, language and tool. So, if you are interested in that I can share it in a separate blog post; as for now, thank you very much for reading.

