In this article we will learn how to integrate Cronofy within Rails to interact with a calendar and create events inside our application. Keep reading!👇
As you may know, Cronofy already has a tutorial you can follow as a developer, however I had some trouble along the way and I wanted to make it easier for you, so you get to know this awesome technology.
Let’s Go for The Big Picture, What Can We Do With Cronofy? 🤔
The main job of Cronofy is to ensure that our application interacts with calendar data. Also, it gives the user control about how much data they want to share about their calendar.
Cronofy ensures interaction with calendars data.
Among other things, your users could make appointments with doctors/teachers/interviewers by allowing them to see their availability and select the time slot that suits them best. As for professionals, Cronofy can allow them to set rules for availability.
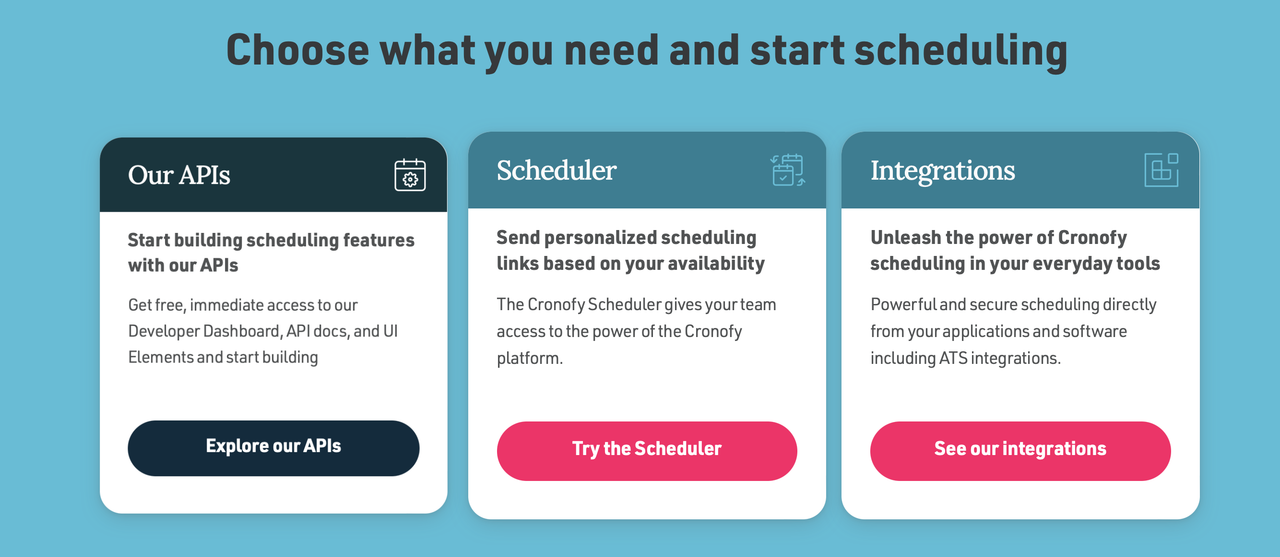
This technology also gives the developer tools like a Developer Dashboard, API docs, and UI Elements to integrate Cronofy within Rails or any other framework of your preference.

So, How Do We Use Cronofy’s Basic Features? 😮
To do so, we will go through the next steps:
1. Use the demo in the "starter" branch
4. Integrate the Cronofy ruby gem into the rails application
7. Create new events (add the new event to your calendar and display a confirmation)
👀 The Steps, Broken Down For You:
1. The Repo
We will be using the Cronofy demo app in this repo.
So, please clone it in your local and ensure that you:
- Are using the 2.7.2 Ruby version— you can use a Ruby version manager, like rbenv to change between versions.
- Can run bundle install— if you have problems, please delete the Gemfile.lock file and try again.
- Erase the
config/credentials.yml.enccode> file if you see it at the beginning of the repo— you are going to generate your own later.
2. Cronofy App
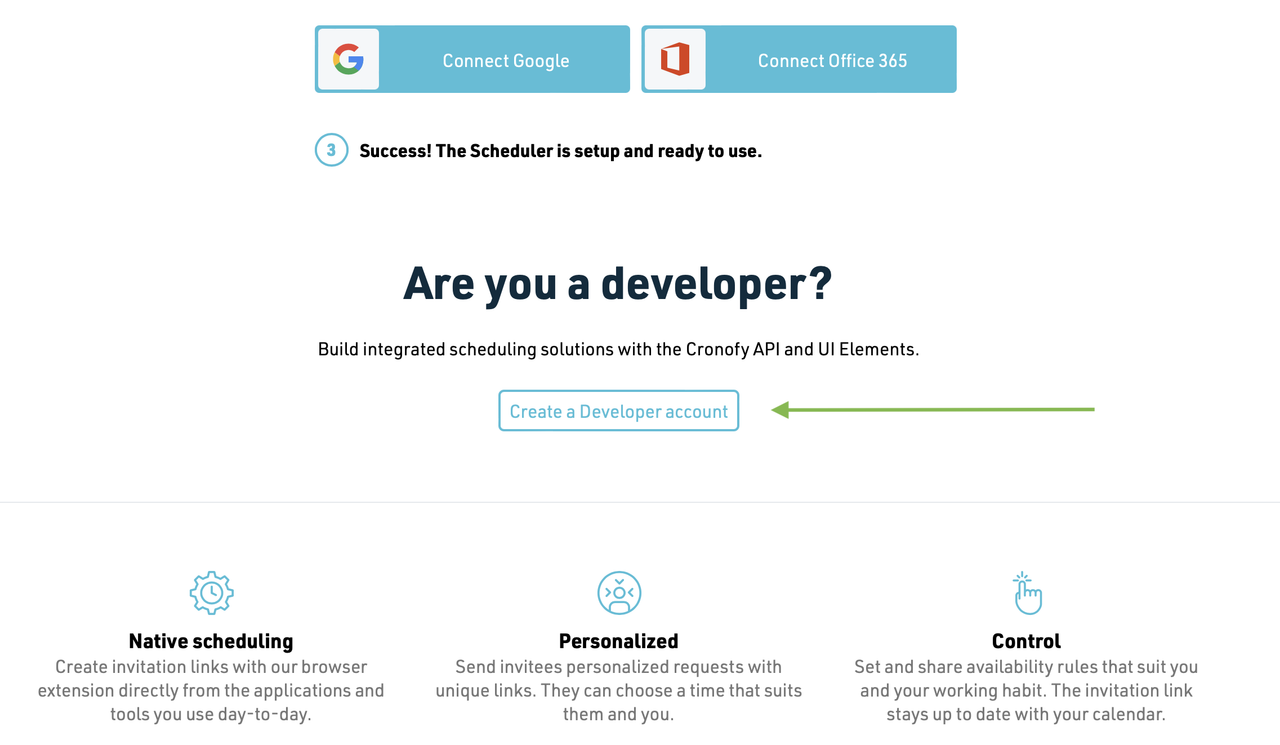
Create a developer account on Cronofy. Just visit the page and click on “Sign Up”. Then go to the bottom of the page and click on “Create a Developer account”.

- Choose the data center of your preference, the default is “US”
- Fill in the form with your data
- In
Select your programming language, choose Ruby - Accept terms and conditions
- Click on
"Create"
Then, in the following screen:
- Name your app. I will put “DemoApp” as an example but you can name yours as you want 😉
-
Just for this example, set the URL to http://localhost:3000
-
Click on
"Create"an app -
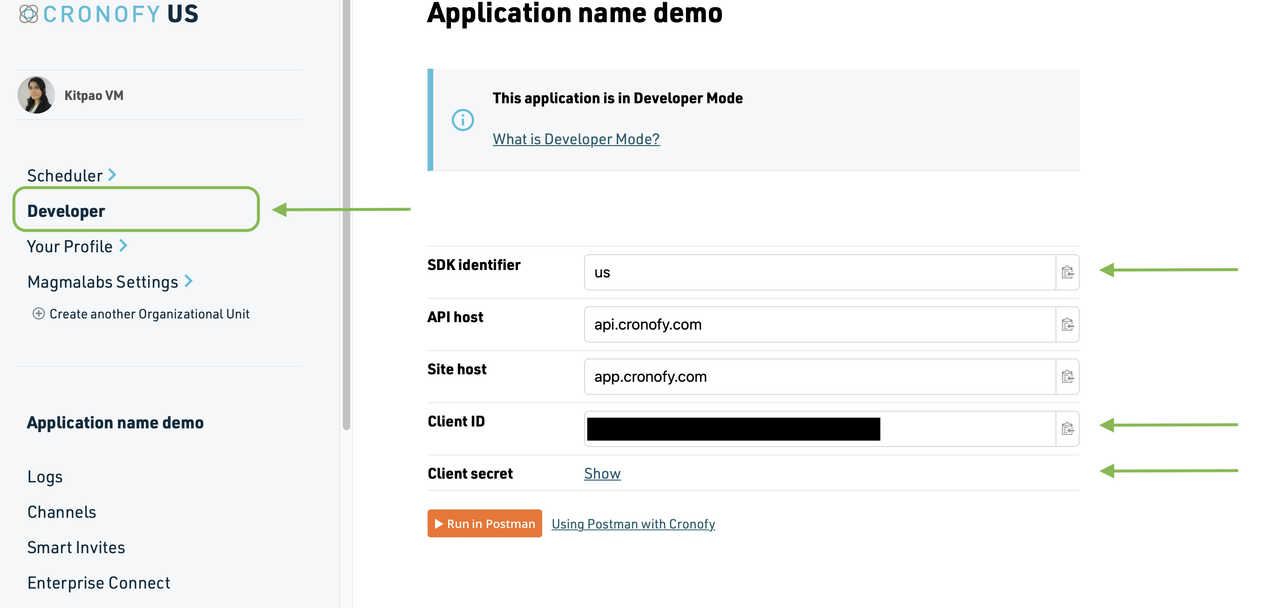
Your Cronofy app credentials will appear. You can also return to this page by clicking on the left panel “Developer”, and on the right side, click on “DemoApp” (or whatever name you chose for your app). We will be using these credentials later.
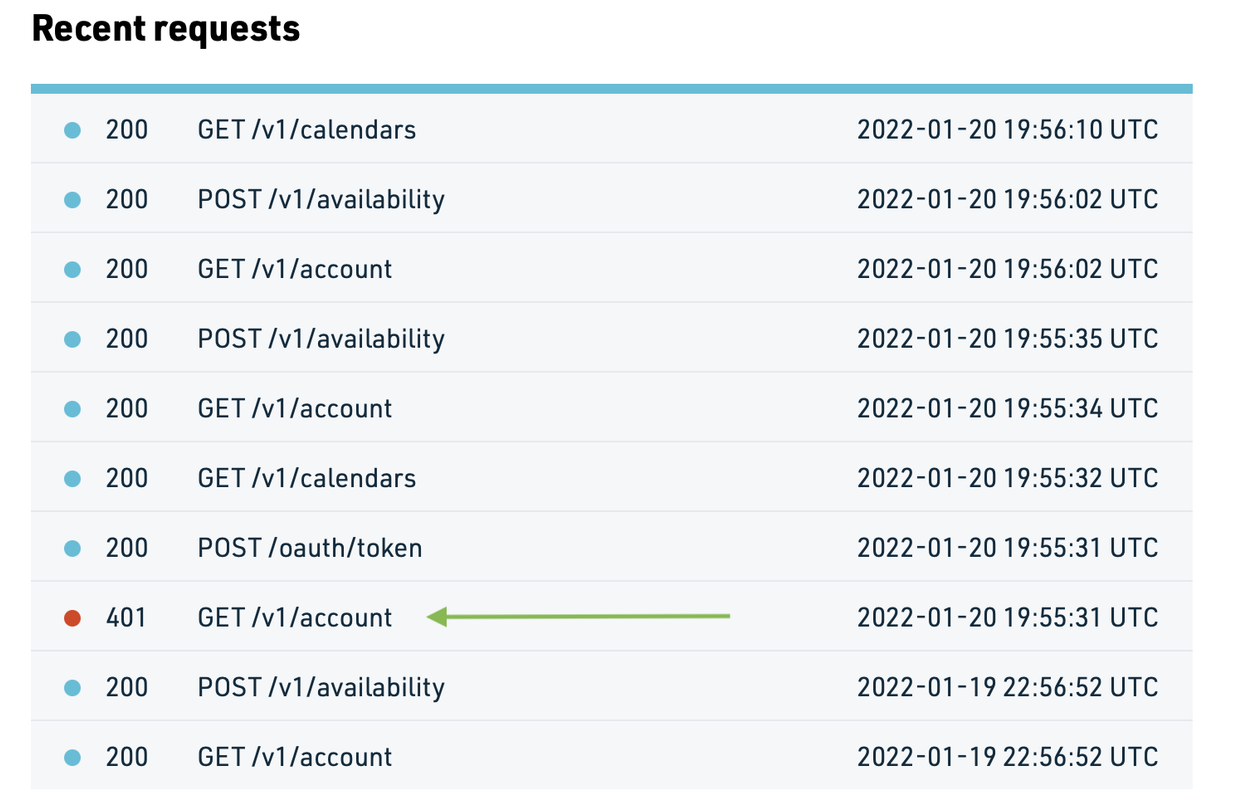
That’s it for now, do not connect a calendar yet, we will use the API for that. Also, if something goes wrong while you are trying to follow along with the steps, you can check this dashboard page and check the logs. So if you see a red circle next to your request, you can click on the item and it will give you more details about the error.

3. Credentials
Here we will pass the Cronofy app credentials to our Rails app, this is where we begin to integrate Cronofy within Rails. Remember it is important the secrets are not exposed in the code, there are many tools to do this. So I will put 2 methods to pass credentials, but you can choose whichever you like. However, notice that in the Cronofy demo repository, everything is already set up for using option B:
A) dot env files
B) encrypt credentials
A) Dot env Files
You can use a third-party gem called dotenv, usage is in their GitHub repo. Dotenv allows you to have your credentials stored in one file that will be ignored by .gitignore and call them from your rails app as a variable.
Please use the following variable names:
  CLIENT_ID: value_of_client_id
  CLIENT_SECRET: value_of_client_secret
  DATA_CENTER: value_of_SDK_identifier
The values to these variables can be found in your Cronofy DemoApp Dashboard, please replace them with the correct values (see image at the end of this step).
Note: Do not forget the .env file is ignored with .gitignore
B) Encrypt Credentials
Rails can encrypt credentials, to do so, make sure you have already run the “bundle install” command in your project, if you have not, please run it.
Then, use the following command in your terminal: rails credentials:edit.
If it does not run, it is because you are missing a default editor. For example, if you use Atom, you would write it like this: EDITOR=“atom --wait” bin/rails credentials:edit.
This will create a file config/master.key with the master key to decrypt and open a decrypted version of the config/credentials.yml.enc file for edition.
At the beginning of the file, add the following lines:
cronofy:
  client_id: CLIENT_ID_VALUE
  client_secret: CLIENT_SECRET_VALUE
  data_center: DATA_CENTER_ID_VALUE
Please replace CLIENT_ID_VALUE and CLIENT_SECRET_VALUE with the credentials you generated when we created the Cronofy app. Then, DATA_CENTER_ID_VALUE appears as SDK identifier in the Dashboard; the default is us (see image at the end of this step). Save and close the file and it will be automatically encrypted again.
Note: Do not forget to ensure both files (config/master.key and config/credentials.yml.enc) are ignored with .gitignore

4. Cronofy SDK
You may have noticed that in the gemfile of the project, we already have the gem 'cronofy’.
Now we are going to prepare the app to make calls to the API.
a) If you used the dotenv option:
Within the application_controller.rb file, place the following code:
def cronofy_client(user = nil)
  client_id =     ENV.fetch(‘CLIENT_ID’)
  client_secret = ENV.fetch(‘CLIENT_SECRET’)
  data_center =   ENV.fetch(‘DATA_CENTER’)
end
b) If you used the option to encrypt credentials:
Within the application_controller.rb file, place the following code:
def cronofy_client(user = nil)
    client_id =     Rails.application.credentials[:cronofy][:client_id]
    client_secret = Rails.application.credentials[:cronofy][:client_secret]
    data_center =   Rails.application.credentials[:cronofy][:data_center]
end
After grabbing the credentials
The previous code makes the credentials available for the Cronofy::Client class, so now we will add within the cronofy_client method a new instance of Cronofy::Client:
Cronofy::Client.new(
    client_id:     client_id,
    client_secret: client_secret,
    data_center:   data_center
)
5. Connect a Calendar 🗓️
Link to authenticate
First, we need to allow users to connect to a calendar, so we will add a link so they can authenticate. To add it, use this code in the user controller, index action:
@cronofy = cronofy_client
@authorization_url = @cronofy.user_auth_link('http://localhost:3000/oauth2/callback')
Check that these routes are correct:
  root to: 'users#index'
  get 'oauth2/callback', to: 'users#connect' # fix this line in your app
In the views, go to the users/index.html.erb file and replace the # of the link_to with @authorization_url. When this works, you will ensure that the communication works and you have begun to integrate Cronofy with Rails.
That link will direct the user to an authentication form, after the user authenticates, we want to grab the ACCESS_TOKEN among other data so that we can request on behalf of the account.
Managing response
Now lets take the data from the response and save it into the user id if it doesn’t exist already. Go to the users_controller.rb file, in the connect action, and add this code:
@cronofy = cronofy_client()
code = [params[:code]]
response = @cronofy.get_token_from_code(code, 'http://localhost:3000/oauth2/callback')

if User.where(account_id: response.account_id).exists?
    user = User.find_by(account_id: response.account_id)
    user.update(
        access_token: response.access_token,
        refresh_token: response.refresh_token
    )
    user.save
    else
        user = User.create(
            account_id: response.account_id,
            access_token: response.access_token,
            refresh_token: response.refresh_token
        )
    end

redirect_to root_path
You can now try the app with the rails server command and check the localhost:3000 url in a browser. The connect button should redirect you through the authentication process and when you get back to your rails app, a new user will be created. If this is your first time connecting, you can check the created user with the rails console.
Notes
If you connect more calendars, it will not create new users since these new calendars will be attached to your last user. The number of calendars connected will depend on how many calendars you have within your external calendar app (for example, in my Google account I have 2 calendars— one for work, and another one for personal issues— so I will have 2 calendar connections with the same email).
One thing to note is that we’re going to skip any user management in this article and instead always use User.last. That is because for now, we are focusing on the first steps to integrate Cronofy with Rails, but you will want to look up the sub and access token for the user you are acting as (i.e. the currently logged-in user).
If you connect more calendars, it will not create new users since these new calendars will be attached to your last user. The number of calendars connected will depend on how many calendars you have within your external calendar app (For example, in my Google account I have 2 calendars, one for work, and another one for personal issues— so I will have 2 calendar connections with the same email).
Displaying a list of all connected calendars
We will now see all the calendars from people who have connected through your app. (Notice that without user management, all the calendars will belong to one user).
In the application_controller.rb file, replace the existing client with the following code:
if user
    Cronofy::Client.new(
        client_id:     client_id,
        client_secret: client_secret,
        data_center:   data_center,
        access_token: User.last.access_token,
        refresh_token: User.last.refresh_token
    )
else
    Cronofy::Client.new(
        client_id:     client_id,
        client_secret: client_secret,
        data_center:   data_center
    )
end
If there is an account, this will request from the account, if not, it will request as the application (without tokens).
Finally, to view the calendars on the front end, open the users/index.html.erb file within the views/ directory and add in the following code within the card-body div.
<% @calendars.each  do |calendar| %>
<div class="row bg-light border mb-2 p-2">
    <div class="col-auto pt-1"><%= calendar.profile_name %></div>
    <div class="col-auto pt-1"> <%= calendar.provider_name %></div>
    <div class="col-auto">
        <%= link_to 'View availability', calendar_path(calendar.calendar_id), class: "btn btn-secondary" %>
    </div>
</div>
<% end %>
Notes
1) This code does not implement user management, this means that there is no way to switch users because there is no login/logout in the app. For this, you can implement the authentication strategy you prefer, if you are using omniauth, the omniauth-cronofy gem is suggested (https://github.com/cronofy/omniauth-cronofy)
2) It is probable that later you will have a “Cronofy::AuthenticationFailureError Exception: 401 Unauthorized” error. This is because the access token has already expired. You can fix this by requesting a new access token with the refresh token that is already saved in the user.
Refresh access token
Simply go to your Application controller and at the top of the Class, add the following line:
rescue_from Cronofy::AuthenticationFailureError, with: :refresh_access_token
Then define the private method at the end of the class:
private

def refresh_access_token
  @user = User.last
  @cronofy = cronofy_client(@user)
  response = @cronofy.refresh_access_token

  if User.where(refresh_token: response.refresh_token).exists?
    user = User.find_by(refresh_token: response.refresh_token)
    user.update(access_token: response.access_token)
    user.save
  end
  redirect_to root_path
end
This will take your user, verify its refresh token, and when verifyed it will update the access token in your user.
6. View Availability
We also want to be able to view our availability for a set period of time and to be able to select a time slot to create a new event later.
Cronofy API needs this information to call the availability query:
- The participants that we want to query.
-
The required duration of the event we want to book.
-
An array of periods to check availability in. (Take care that these dates are not in the past, or too far in the future, try it within a period of 6 months apart from your current date.)
The code
In the calendars controller let’s make available the info the API needs in the show action:
  @cronofy = cronofy_client(User.last)
  @calendar = [params[:id]]
  @duration_minutes = 60
  @my_sub = @cronofy.account.account_id
Add the following code as a private method in the calendar controller:
private

  def request_availability
    {
      "participants": [{
        required: "all",
        members: [{
        sub: @my_sub # here, we want only our calendar to be modified
        }]
      }],
      "response_format": "slots",
      "required_duration": { "minutes": @duration_minutes },
      "available_periods": [
        {
          start: "2022-06-10T09:00:00Z",
          end: "2022-06-10T10:00:00Z"
        },
        {
          start: "2022-06-10T15:00:00Z",
          end: "2022-06-10T17:30:00Z"
        }
      ]
    }
  end
Then add the call in the show action of the calendar controller:
@available_periods = @cronofy.availability(request_availability)
Note that this will only request the availability of yourself since you are using the Cronofy account (@my_sub) that was created when you granted permission to the Cronofy app. If you wanted to add more users, you would need to use that person’s account id (i.e. User.second.account_id)
Now in your rails server, when you click on the View availability button, you should be able to see all of the times our participant (you) declared as available.
Also notice that even if you have an event in a certain slot, it will still show it as available because we hardcoded this information.
7. Add an Event To The Calendar
In this final step, we will use the Create or Update Event endpoint of the Cronofy API; this request needs to give some data— lets add it in the calendars controller, on the create action:
  def create
    @cronofy = cronofy_client(User.last)
    calendar_id = params[:id]
    start_time = Time.parse(params[:slot])
    end_time = start_time + params[:duration_minutes].to_i.minutes
    @event_data =
      {
        event_id: 'uniq-id',
        summary: 'Demo event summary',
        description: 'Demo event description',
        start: start_time,
        end: end_time,
        location: {
          description: "Meeting room"
        }
      }

    @cronofy.upsert_event(calendar_id, @event_data)
  end
Note: You could also create some kind of form so the user can input some of the data (summary, description, location, etc), but the purpose of this article is to show you how you can use Cronofy.
Now, go to your app and click on the button “Create event”, a confirmation screen will appear, and you can even go to your own calendar and check that there is now an event called “Demo Event Summary” in the selected date and time.
Congratulations! we have an app that can create events in your calendar and you have learned how to integrate Cronofy with Rails!
If you want to go deeper into Cronofy, please use the Cronofy docs.
Well, that is all for now. Thank you so much for reading my blog post! 💖
Btw, you can also follow my work, or give me your feedback on my GitHub and LinkedIn.
Or, 🤓 maybe you could share this article…
My best regards!


