
Choosing the right API testing tools is crucial to ensure your application runs reliably and efficiently. In this guide, you’ll learn how to test APIs using Postman for manual testing, Supertest for automated workflows, and JMeter for performance testing. Whether you’re a beginner or a QA pro, these tools cover all aspects of modern API quality assurance.
Tools Overview
- Postman: Ideal for manual testing, exploratory testing, and creating shared collections.
- Supertest + Jest: Best for automated test suites written in JavaScript.
- Apache JMeter: A powerful tool for simulating high user loads and measuring API performance.
- Public APIs: This guide uses public APIs like Fake Store API and Swagger Pet Store.
Manual API Testing With Postman
Postman is one of the most popular tools for manual API testing, offering a user-friendly interface that allows developers and testers to craft, send, and inspect HTTP requests without writing any code. It’s especially useful during the early stages of API development, when endpoints are still being defined, and frequent adjustments are needed.
Manual testing with Postman is ideal when:
- Exploring or debugging new APIs: Postman makes it easy to quickly test different endpoints, modify parameters, and inspect responses to ensure everything behaves as expected.
- Validating responses and status codes: It allows testers to visually confirm headers, payloads, and response formats.
- Creating collections for demonstration or documentation: You can group and save requests in collections, share them with your team, and even generate documentation directly from them.
- Running quick, ad-hoc tests: For situations where automated tests may be overkill or too time-consuming to set up, Postman offers a lightweight, flexible alternative.
However, while Postman excels in exploratory and one-off testing scenarios, it’s not well-suited for large-scale automation or performance testing.
Here is how you can create a project for manual testing of your API using postman:
Step 1: Install Postman
- Download Postman
Visit the official Postman website and choose the version suitable for your operating system (Windows, macOS, or Linux). - Install Postman
Follow the installation prompts for your platform. Once installed, launch the application. - (Optional) Create a Free Account
You can use Postman without an account, but creating one allows you to sync your collections across devices and access collaboration features.
Step 2: Create a New Collection
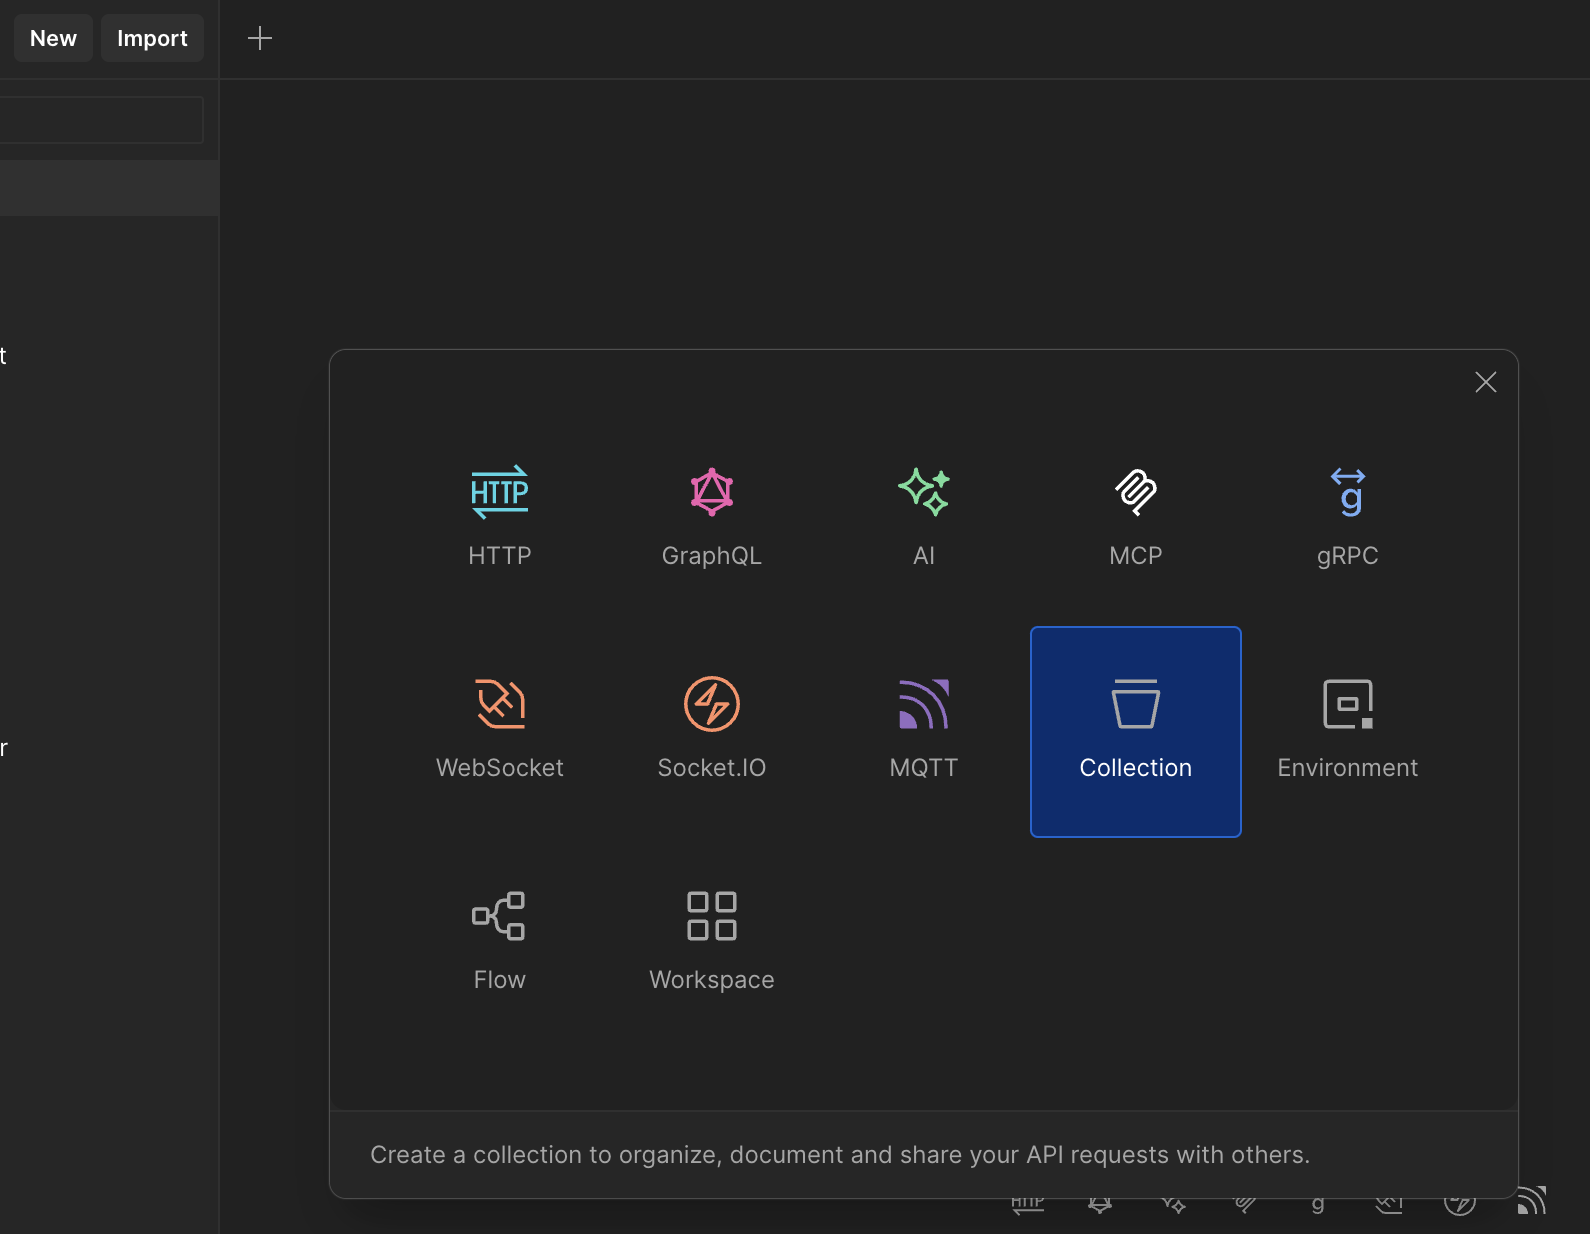
1. Click New > Collection.

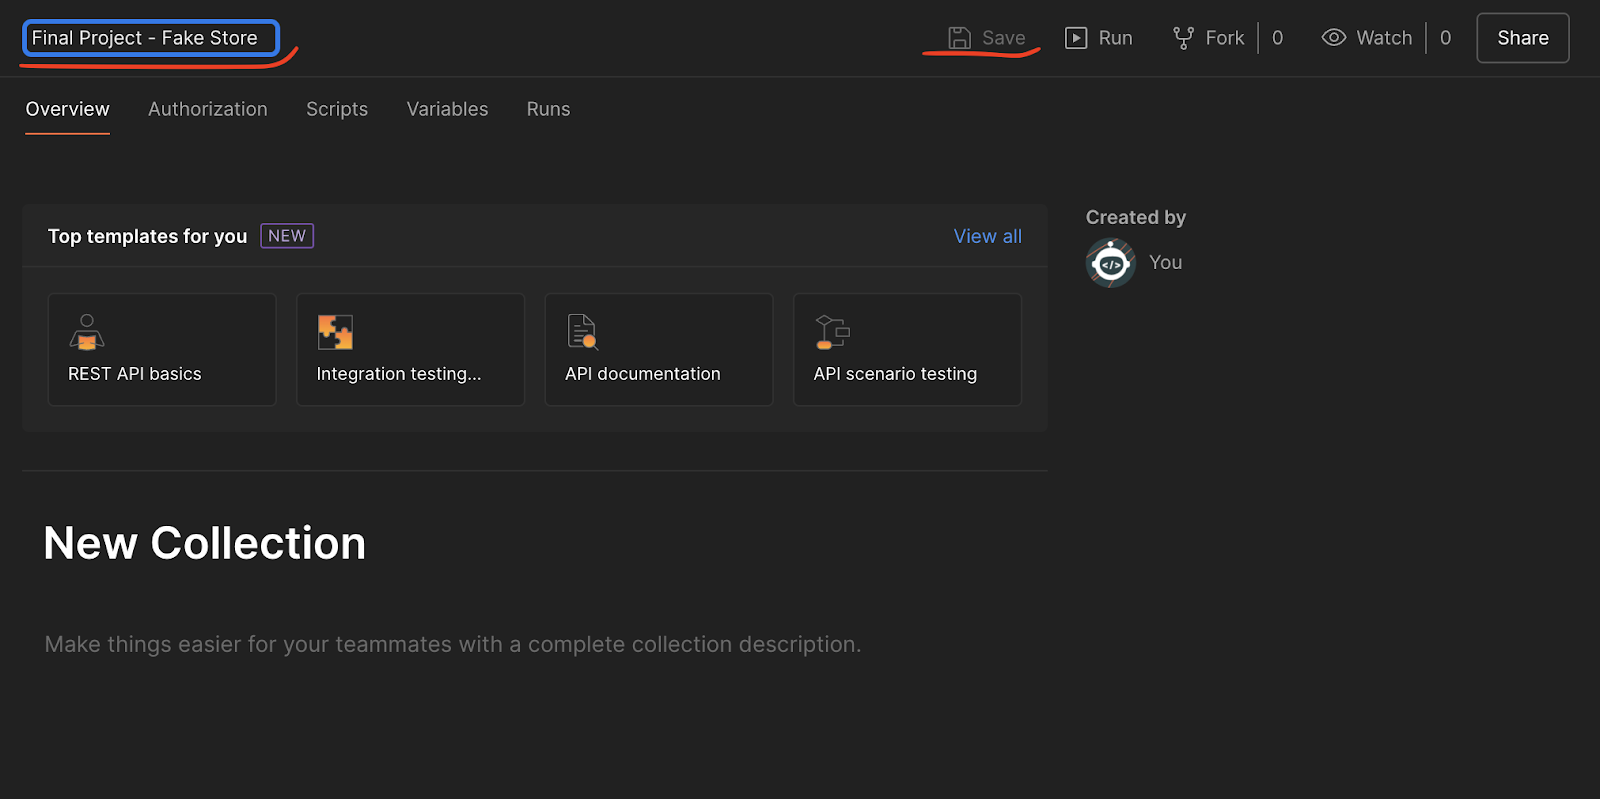
2. Enter a name for your collection (e.g., API Testing Project) and click Save.

Step 3: Create a New Environment
1. In Postman, navigate to the Environments section.
2. Click New to create a new environment.

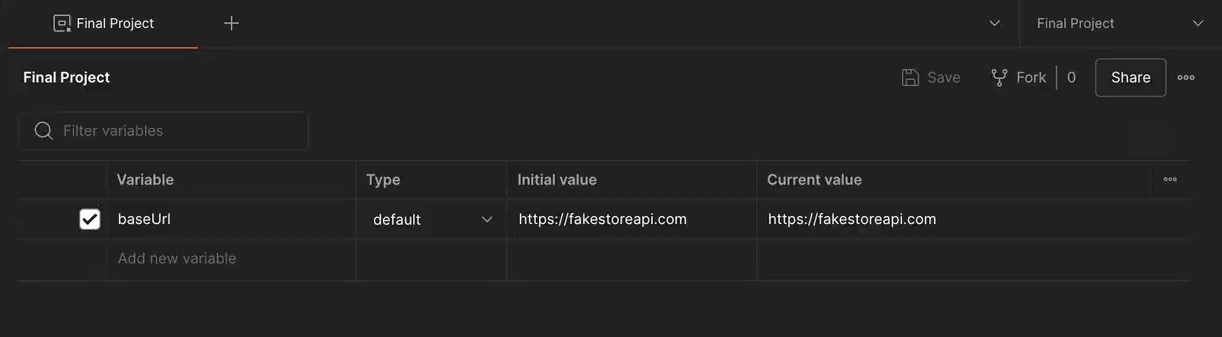
3. Name your environment (e.g., Fake Store API), and create a variable called baseUrl.
- Set both the Initial Value and Current Value to the public API URL from Fake Store API, e.g., https://fakestoreapi.com

Step 4: Add Requests to the Collection
A. GET Request – Get Products
1. Inside your collection, click Add Request
2. Name it: Get Products
3. Set the method to GET
4. URL: {{baseUrl}}/products

5. Go to the Scripts tab (named “Tests” in older versions).
6. Go to Post-response and add some assertions (these are validations to ensure the response meets expectations).

Here are some assertions examples:
pm.test("The response is an array", () => {
   let jsonData = pm.response.json();
   pm.expect(jsonData).to.be.an("array");
});

pm.test("The list contains at least one product", () => {
   let jsonData = pm.response.json();
   pm.expect(jsonData.length).to.be.above(0);
});

pm.test("Every product contains the required properties", () => {
   let jsonData = pm.response.json();
   jsonData.forEach(product => {
       pm.expect(product).to.have.property("id");
       pm.expect(product).to.have.property("title");
       pm.expect(product).to.have.property("price");
       pm.expect(product).to.have.property("description");
       pm.expect(product).to.have.property("category");
       pm.expect(product).to.have.property("image");
       pm.expect(product).to.have.property("rating");
   });
});

pm.test("Every product contains the correct datatype", () => {
   let jsonData = pm.response.json();
   jsonData.forEach(product => {
       pm.expect(product.id).to.be.a("number");
       pm.expect(product.title).to.be.a("string");
       pm.expect(product.price).to.be.a("number");
       pm.expect(product.description).to.be.a("string");
       pm.expect(product.category).to.be.a("string");
       pm.expect(product.image).to.be.a("string");
       pm.expect(product.rating).to.be.an("object");
   });
});
B. GET Request – Get Single Product
1. Inside your collection, click Add Request
2. Name it: Get Single Product
3. Set the method to GET
4. URL: {{baseUrl}}/products/2

In the Scripts tab >> Post-response, add assertions. Here are some examples:
const product = pm.response.json();
pm.test("Response is a valid object", () => {
   pm.expect(product).to.be.an("object");
});

pm.test("The product contains the required properties", () => {
       pm.expect(product).to.have.property("id");
       pm.expect(product).to.have.property("title");
       pm.expect(product).to.have.property("price");
       pm.expect(product).to.have.property("description");
       pm.expect(product).to.have.property("category");
       pm.expect(product).to.have.property("image");
       pm.expect(product).to.have.property("rating");
});

pm.test("Properties have correct datatypes", () => {
   pm.expect(product.id).to.be.a("number");
   pm.expect(product.title).to.be.a("string");
   pm.expect(product.price).to.be.a("number");
   pm.expect(product.description).to.be.a("string");
   pm.expect(product.category).to.be.a("string");
   pm.expect(product.image).to.be.a("string");
   pm.expect(product.rating).to.be.an("object");
});
C. POST Request – Create Product
1. Add another request: Create Product
2. Set the method to POST
3. URL: {{baseUrl}}/products

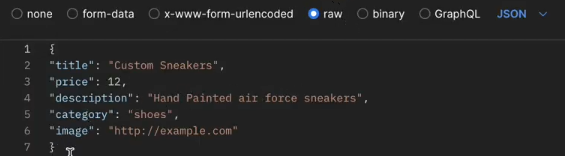
4. In the Body tab, select raw and set the format to JSON.

5. Add the following JSON body to create a new product
6. In the Scripts tab >> Post-response, add assertions. Here are some examples:
const product = pm.response.json();
const requestData = JSON.parse(pm.request.body.raw);

pm.test("The new product contains the required properties", () => {
   pm.expect(product).to.have.property("id");
   pm.expect(product).to.have.property("title");
   pm.expect(product).to.have.property("price");
   pm.expect(product).to.have.property("description");
   pm.expect(product).to.have.property("category");
   pm.expect(product).to.have.property("image");
});

pm.test("Datatypes are correct", () => {
   pm.expect(product.id).to.be.a("number");
   pm.expect(product.title).to.be.a("string");
   pm.expect(product.price).to.be.a("number");
   pm.expect(product.description).to.be.a("string");
   pm.expect(product.category).to.be.a("string");
   pm.expect(product.image).to.be.a("string");
});

pm.test("New product data match the response", () => {
   pm.expect(product.title).to.eql(requestData.title);
   pm.expect(product.price).to.eql(requestData.price);
   pm.expect(product.description).to.eql(requestData.description);
   pm.expect(product.category).to.eql(requestData.category);
   pm.expect(product.image).to.eql(requestData.image);
});
D. PUT Request – Update Product
1. Add another request: Update Product
2. Set the method to PUT
3. URL: {{baseUrl}}/products/2
(Replace 2 with the ID of a product from your Get Request if needed).

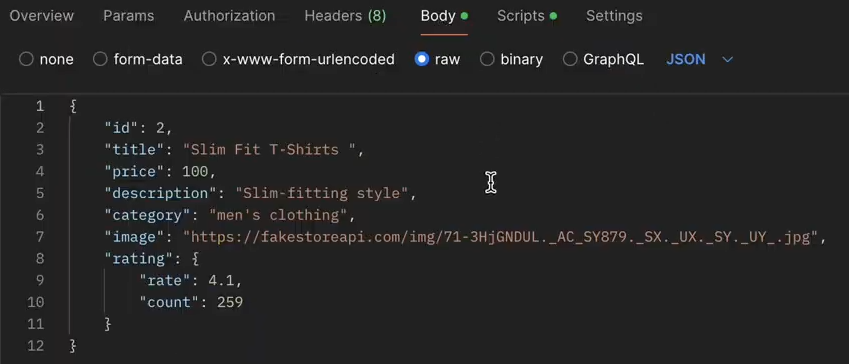
4. In the Body tab, select raw and JSON format.

5. Add the following JSON body to update an existing product
6. In the Scripts tab >> Post-response, add assertions. Here are some examples:
const updatedProduct = pm.response.json();
const requestData = JSON.parse(pm.request.body.raw);

pm.test("The updated product contains the required properties", () => {
   pm.expect(updatedProduct).to.have.property("id");
   pm.expect(updatedProduct).to.have.property("title");
   pm.expect(updatedProduct).to.have.property("price");
   pm.expect(updatedProduct).to.have.property("description");
   pm.expect(updatedProduct).to.have.property("category");
   pm.expect(updatedProduct).to.have.property("image");
});

pm.test("Datatypes are correct", () => {
   pm.expect(updatedProduct.id).to.be.a("number");
   pm.expect(updatedProduct.title).to.be.a("string");
   pm.expect(updatedProduct.price).to.be.a("number");
   pm.expect(updatedProduct.description).to.be.a("string");
   pm.expect(updatedProduct.category).to.be.a("string");
   pm.expect(updatedProduct.image).to.be.a("string");
});

pm.test("Updated data match the response", () => {
   pm.expect(updatedProduct.title).to.eql(requestData.title);
   pm.expect(updatedProduct.price).to.eql(requestData.price);
   pm.expect(updatedProduct.description).to.eql(requestData.description);
   pm.expect(updatedProduct.category).to.eql(requestData.category);
   pm.expect(updatedProduct.image).to.eql(requestData.image);
});
E. DELETE Request – Delete Product
1. Add another request: Delete Product
2. Set the method to DELETE
3. URL: {{baseUrl}}/products/1
(Replace 1 with the ID of a product from your Get Request if needed).

4. You can leave the Scripts tab empty for this request — we will add global assertions in the next step to validate this response.
Step 5: Add Global Assertions to the Collection
1. Click on your collection, then go to the Scripts >> Post-response tab.
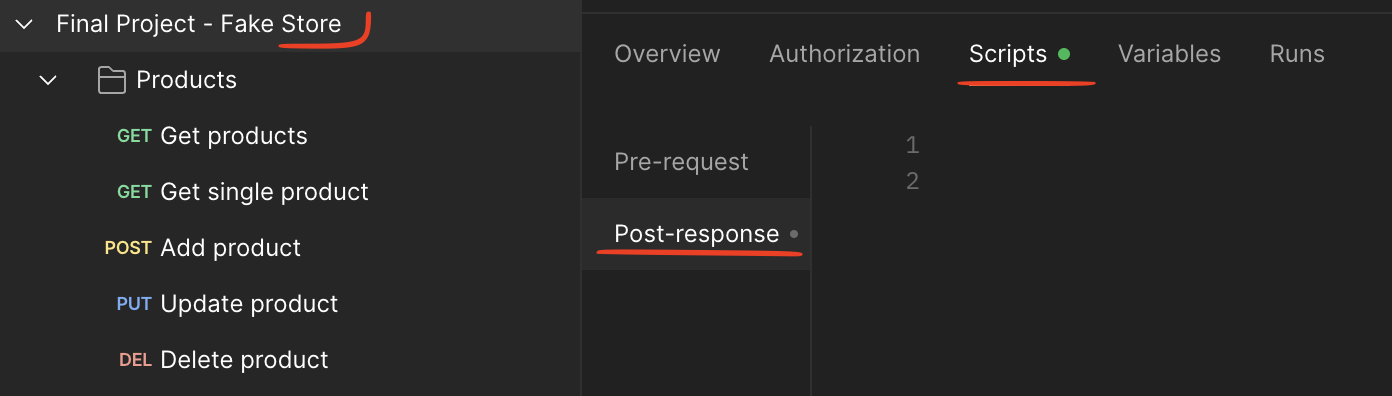
Add assertions here — these will apply to all requests in the collection.
Here’s an example:
pm.test("Status code is 200", () => {
pm.response.to.have.status(200);
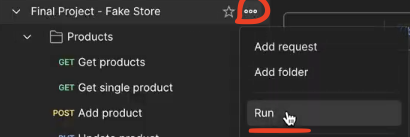
});Step 6: Run the Collection
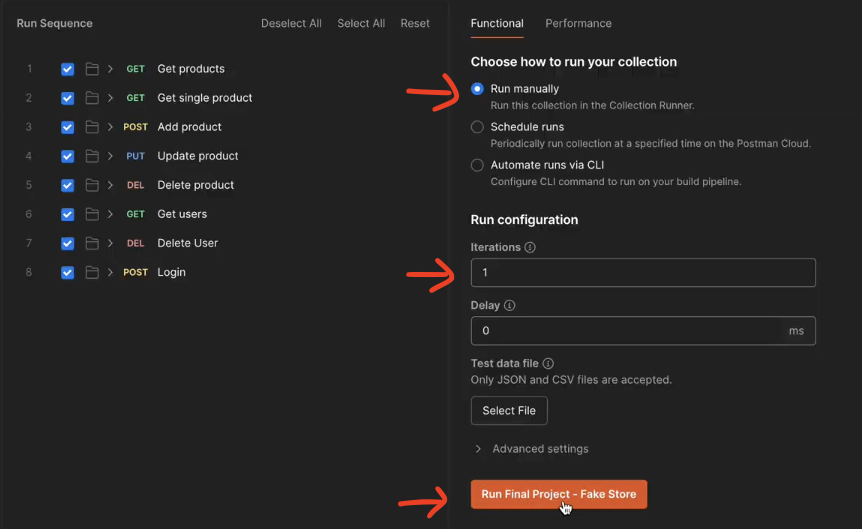
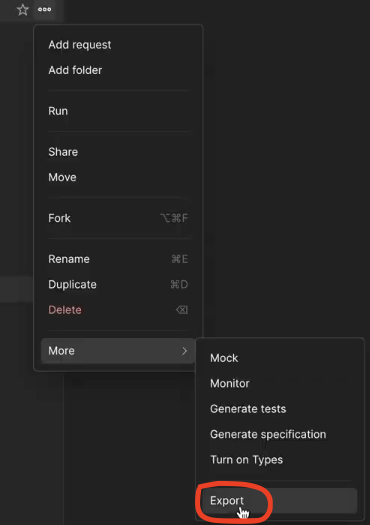
1. Click the three-dot menu (•••) on your collection and select Run.

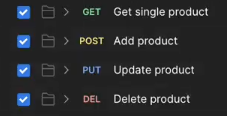
2. Ensure the requests you want to run are selected and follow the next steps
- Choose Run manually
- Set Iterations to 1
- Click Run Collection.
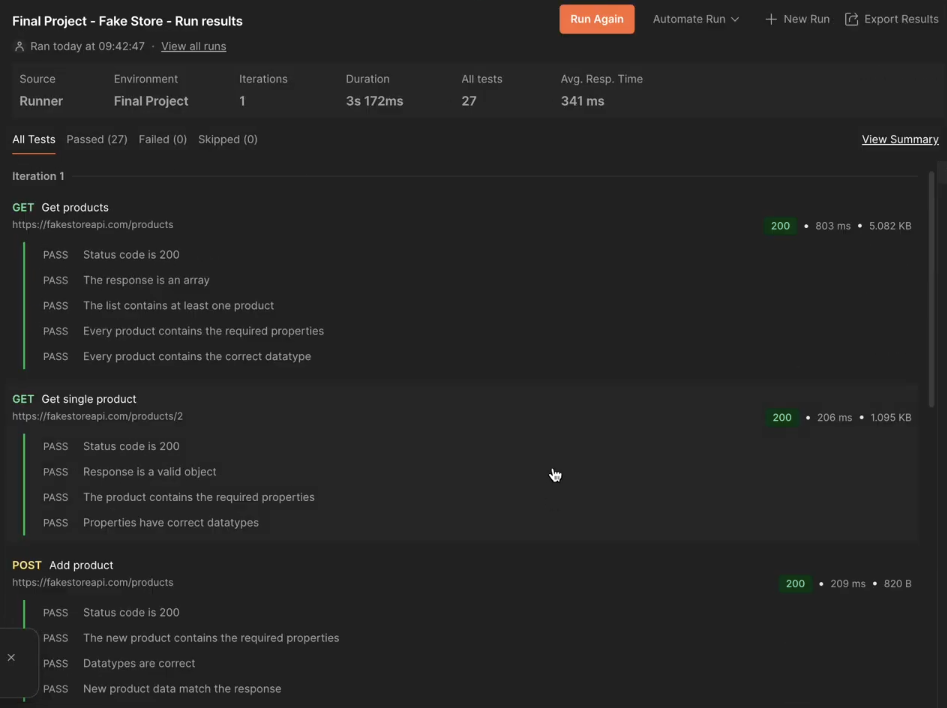
3. Postman will execute all requests in the collection.
4. When the run finishes, you can review the results and see whether all assertions passed.
Data-Driven Testing Using Postman’s Collection Runner and Newman
In this section, you’ll learn how to enhance your API testing by using a data-driven approach. This method allows you to test your APIs with multiple sets of data, making your tests more flexible and efficient. You’ll explore how to achieve this in Postman by combining the Collection Runner with JSON files as data sources, and how to automate these tests using Newman from the command line. By the end, you’ll be able to create robust API tests that handle a wide range of input scenarios.
Newman is a command-line tool that allows you to run and automate your Postman collections outside the Postman app. It’s especially useful for integrating API tests into CI/CD pipelines, automating regression testing, or running tests on servers without a graphical interface.
With Newman, you can execute Postman collections from the terminal, pass in environment variables, run data-driven tests, and generate detailed reports of your test runs. It’s a powerful way to bring Postman’s testing capabilities into automated workflows and make your API testing process more efficient and scalable.
Data-driven testing is especially useful in situations where you need to execute the same test with multiple sets of data. For example:
- When verifying how the API behaves with different combinations of parameters, such as various users, credentials, or configurations.
- When testing different input scenarios, including valid data, invalid data, or edge cases (boundary testing).
- When you want to assess the API’s robustness and stability under large volumes of data or unexpected inputs.
- For regression testing, where the same test cases need to be executed frequently with updated data.
- When the test data comes from external sources, such as CSV files, JSON files, or databases.
By using a data-driven approach, you can reduce test duplication, make your tests more dynamic, and improve the overall coverage of your system under test.
Here is how you can create a project for data-driven testing of your API using Postman’s collection runner and Newman:
Step 1: Install Postman
- Download Postman
Visit the official Postman website and choose the version suitable for your operating system (Windows, macOS, or Linux). - Install Postman
Follow the installation prompts for your platform. Once installed, launch the application. - (Optional) Create a Free Account
You can use Postman without an account, but creating one allows you to sync your collections across devices and access collaboration features.
Step 2: Create a New Collection
1. Click New > Collection.
2. Enter a name for your collection (e.g., API Testing Project) and click Save.
Step 3: Create a New Environment
1. In Postman, navigate to the Environments section
2. Click New to create a new environment

3. Name your environment (e.g., Fake Store API), and create a variable called baseUrl.
- Set both the Initial Value and Current Value to the public API URL from Fake Store API, e.g., https://fakestoreapi.com
Step 4: Add Requests to the Collection
You can be guided by Steps 4 and 5 of the ‘Manual API Testing With Postman’ section to create your requests.
Step 5: Test Your Collection by Running it Manually Using the Collection Runner
You can be guided by Step 6 of the ‘Manual API Testing With Postman’ section to run your collection with the collection runner and make sure your collection works as expected.
Step 6: Test Your Collection by Running it Manually Using the Collection Runner
You can be guided by Step 6 of the ‘Manual API Testing With Postman’ section to run your collection with the collection runner.
Step 7: Create your JSON file
To run data-driven tests with Postman and Newman, you’ll need to create a JSON file that contains the data sets you want to test. Here’s how to do it:
- Create a new JSON file
You can use any text editor (e.g., VS Code, Sublime Text) or an online tool to create your JSON file. Name it something like testData.json. - Structure the JSON file as an array of objects
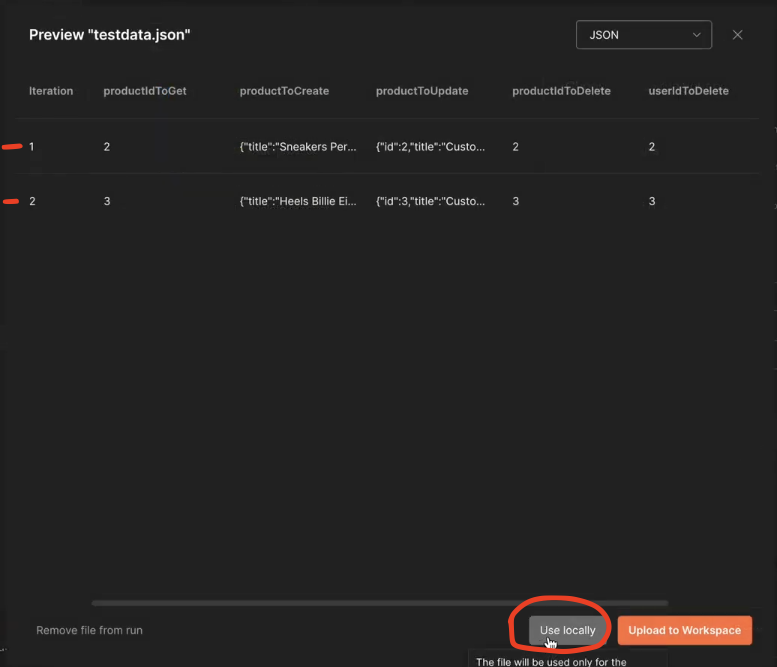
Each object in the array will represent a different set of test data for your requests. Here’s an example structure with 2 iterations:
[
   {
     "productIdToGet": 2,
     "productToCreate": {
       "title": "Sneakers Personalizados",
       "price": 1600,
       "description": "Hand Painted air force sneakers",
       "category": "shoes",
       "image": "http://example.com"
     },
     "productToUpdate": {
       "id": 2,
       "title": "Custom Shirt",
       "price": 1600,
       "description": "Custom style",
       "category": "men's clothing",
       "image": "https://fakestoreapi.com/img/71-3HjGNDUL._AC_SY879._SX._UX._SY._UY_.jpg",
       "rating": {
         "rate": 5,
         "count": 90
       }
     },
     "productIdToDelete": 2
   },
   {
     "productIdToGet": 3,
     "productToCreate": {
       "title": "Heels",
       "price": 1300,
       "description": "Hand Painted heels",
       "category": "heels",
       "image": "http://example.com"
     },
     "productToUpdate": {
       "id": 3,
       "title": "Custom heels",
       "price": 1600,
       "description": "Heels style",
       "category": "women's clothing",
       "image": "https://fakestoreapi.com/img/71-3HjGNDUL._AC_SY879._SX._UX._SY._UY_.jpg",
       "rating": {
         "rate": 10,
         "count": 900
       }
     },
     "productIdToDelete": 3
    }
 ]
What does each part do?
- productIdToGet:
An ID used for a GET request to fetch a specific product.
Example: In the first iteration, it’s 2, so the request will go to {{baseUrl}}/products/2. - productToCreate:
An object containing data for creating a new product in a POST request.
It includes fields like: - title: The name of the product.
- price: The product’s price.
- description: A short description.
- category: The category of the product.
- image: A URL for the product’s image.
- productToUpdate:
An object with updated product information for a PUT request.
It includes the same fields as productToCreate, plus: - id: The ID of the product to update.
- rating: (Optional) Additional details like the rating and number of reviews.
- productIdToDelete:
- The ID of the product you want to delete in a DELETE request.
3. Save the file
Place the JSON file in the same directory where you’ll be running Newman, or provide the full file path when running the collection.
Step 8: Replace Bodies and paths with variables
A. GET Request – Get Single Product
1. Change the url {{baseUrl}}/products to {{baseUrl}}/products/{{productIdToGet}} to obtain only the information from the product specified in your JSON file

2. To define the variable, go to Scripts >> Pre-request and type the next code to assign the value from the JSON data to a Postman variable:

pm.variables.set("productIdToGet",pm.iterationData.get("productIdToGet"));B. POST Request – Create Product
1. In the Body tab, select raw and set the format to JSON. Replace the old body with the variable that contains the data to create a new product in your JSON file
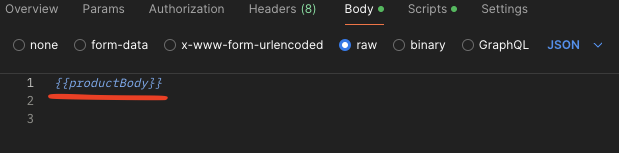
2. To define the variable, go to Scripts >> Pre-request and type the next code to assign the value from the JSON data to a Postman variable:

let product = pm.iterationData.get("productToCreate");
pm.variables.set("productBody", JSON.stringify(product));
C. PUT Request – Update Product
1. Change the url {{baseUrl}}/products/2 to {{baseUrl}}/products/{{productIdToUpdate}} to apply the changes only to the product specified in your JSON file

2. In the Body tab, select raw and set the format to JSON. Replace the old body with the variable that contains the data to update a product in your JSON file
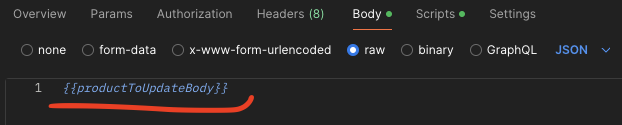
3. To define the variable, go to Scripts >> Pre-request and type the next code to assign the value from the JSON data to a Postman variable:

let product = pm.iterationData.get("productToUpdate");
pm.variables.set("productIdToUpdate", product.id);
pm.variables.set("productToUpdateBody", JSON.stringify(product));
D. DELETE Request – Delete Product
1. Change the url {{baseUrl}}/products/2 to {{baseUrl}}/products/{{productIdToDelete}} to delete only to the product specified in your JSON file

2. To define the variable, go to Scripts >> Pre-request and type the next code to assign the value from the JSON data to a Postman variable:

Step 9: Run the Project with Collection Runner using the JSON file (Manual Data-driven testing)
1. Click the three-dot menu (•••) on your collection and select Run.
2. Ensure that your requests are selected
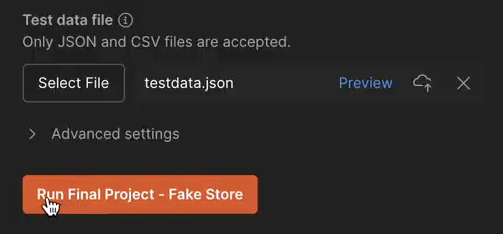
3. Click Select File and choose your JSON file
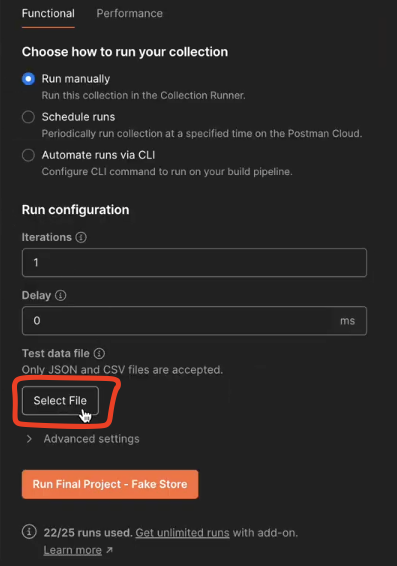
4. Ensure that all the iterations from your file are being loaded and click ‘Use locally’
5. Click on Run
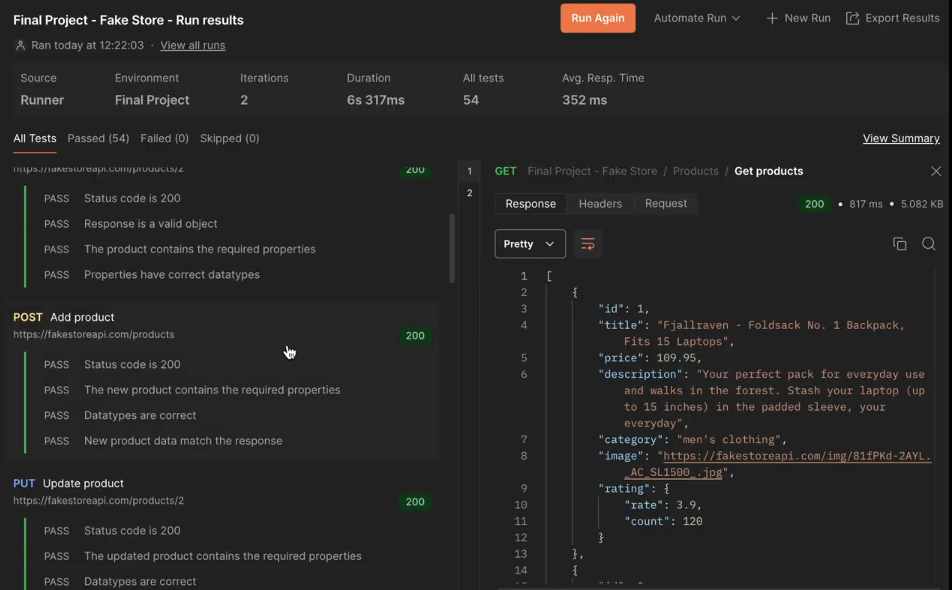
6. Your project will start running using the data from your JSON file. At the end of the run, you will be able to see the results from all the iterations.
Step 10: Run the Project with Newman using the JSON file (Automated Data-driven testing)
1. Open a terminal
2. Install newman globally using the following command
npm install -g newman3. Go to your collection in Postman, click the three-dot menu (•••) and select the Export option and save it.

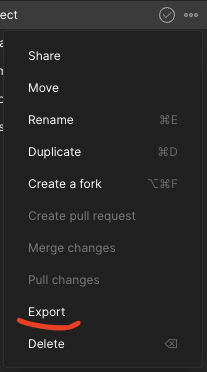
4. Go to your environment in Postman, click the three-dot menu (•••) and select the Export option and save it.
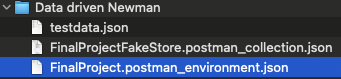
5. In your terminal execute the next command to run your collection, environment and JSON file. Replace the examples with your filenames.
newman run yourcollection.postman_collection.json \
--environment yourenvironment.postman_environment.json \
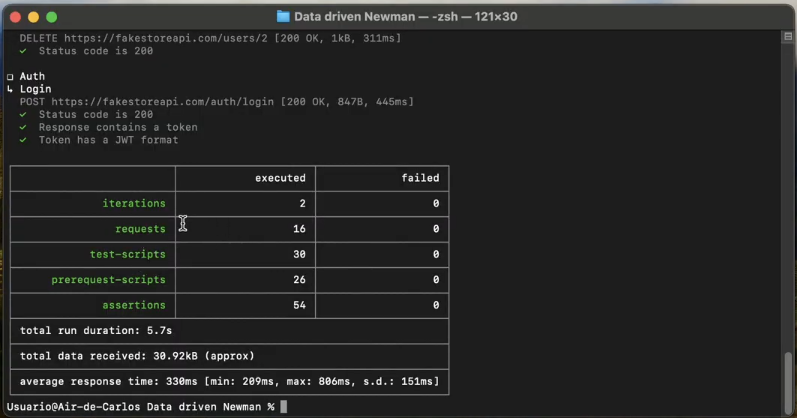
--iteration-data yourjsonfile.json6. Your project will start to run. At the end you will be able to see logs from every request and a results table
Mock Server With Postman
A Mock Server in Postman allows you to simulate API responses without needing a live backend. This is useful when the API you want to test is still under development, or when you want to create predictable responses for testing and prototyping purposes.
With a Mock Server, you can define how your API should respond to specific requests. For example, you can create mock responses for your product data, user profiles, or authentication endpoints, and use them in your Postman tests. This enables you to:
- Test your client-side application even when the backend is not yet available.
- Validate API contracts early in the development process.
- Share a working API model with your team or stakeholders.
- Simulate different response scenarios, including error cases, without changing the backend.
Mock Servers in Postman can be configured to respond based on request methods, URLs, and parameters, allowing you to create realistic simulations of your API behavior. They are also helpful for data-driven testing when you need to test different inputs and outputs in a controlled environment.
Here is how you can create a Mock Server in Postman:
Step 1: Install Postman
- Download Postman
Visit the official Postman website and choose the version suitable for your operating system (Windows, macOS, or Linux). - Install Postman
Follow the installation prompts for your platform. Once installed, launch the application. - (Optional) Create a Free Account
You can use Postman without an account, but creating one allows you to sync your collections across devices and access collaboration features.
Step 2: Create a New Collection
1. Click New > Collection.

2. Enter a name for your collection (e.g., Mock Server Project) and click Save.
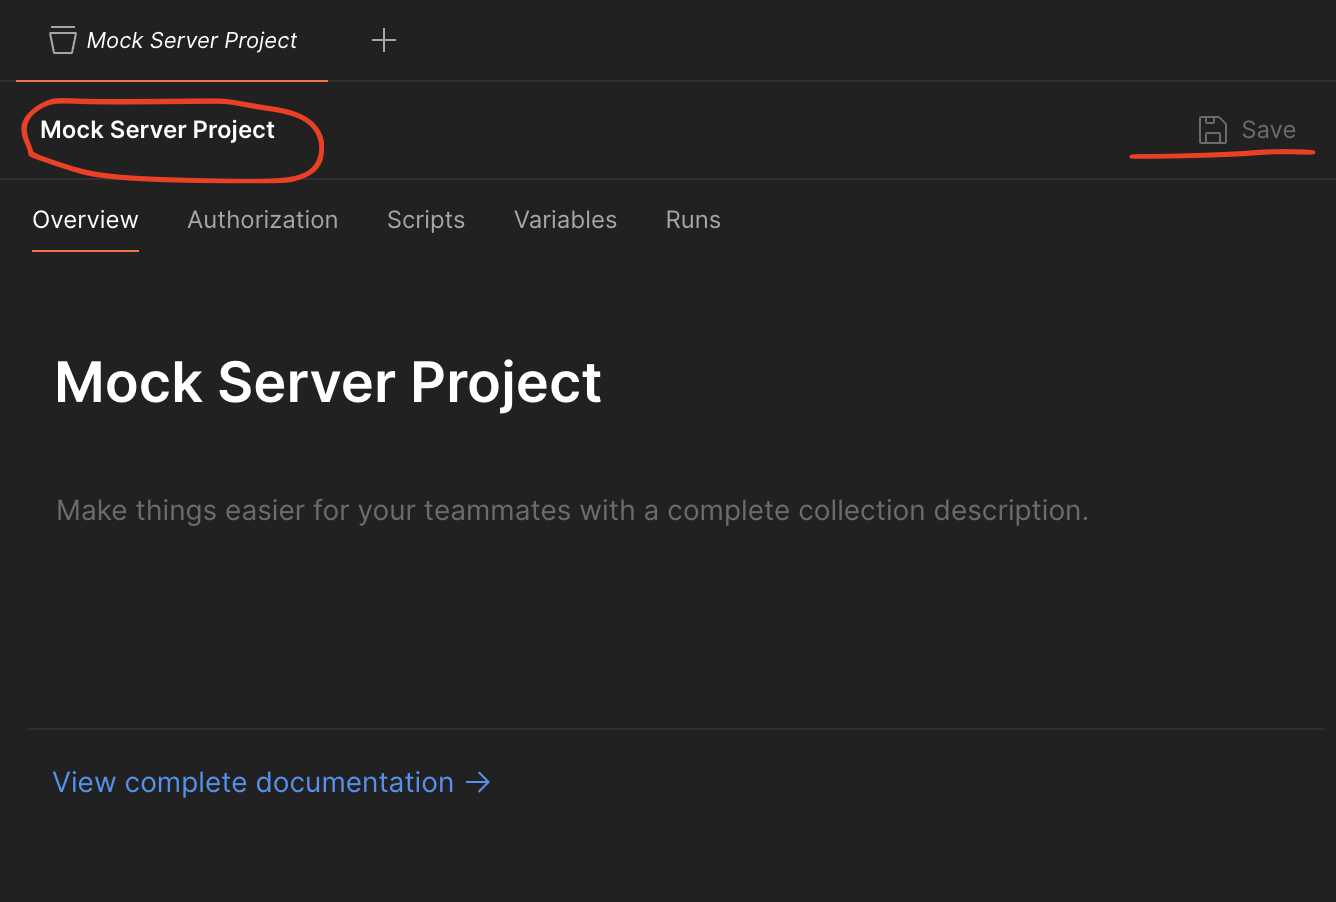
Step 3: Create a New Environment
1. In Postman, navigate to the Environments section.
2. Click New to create a new environment.
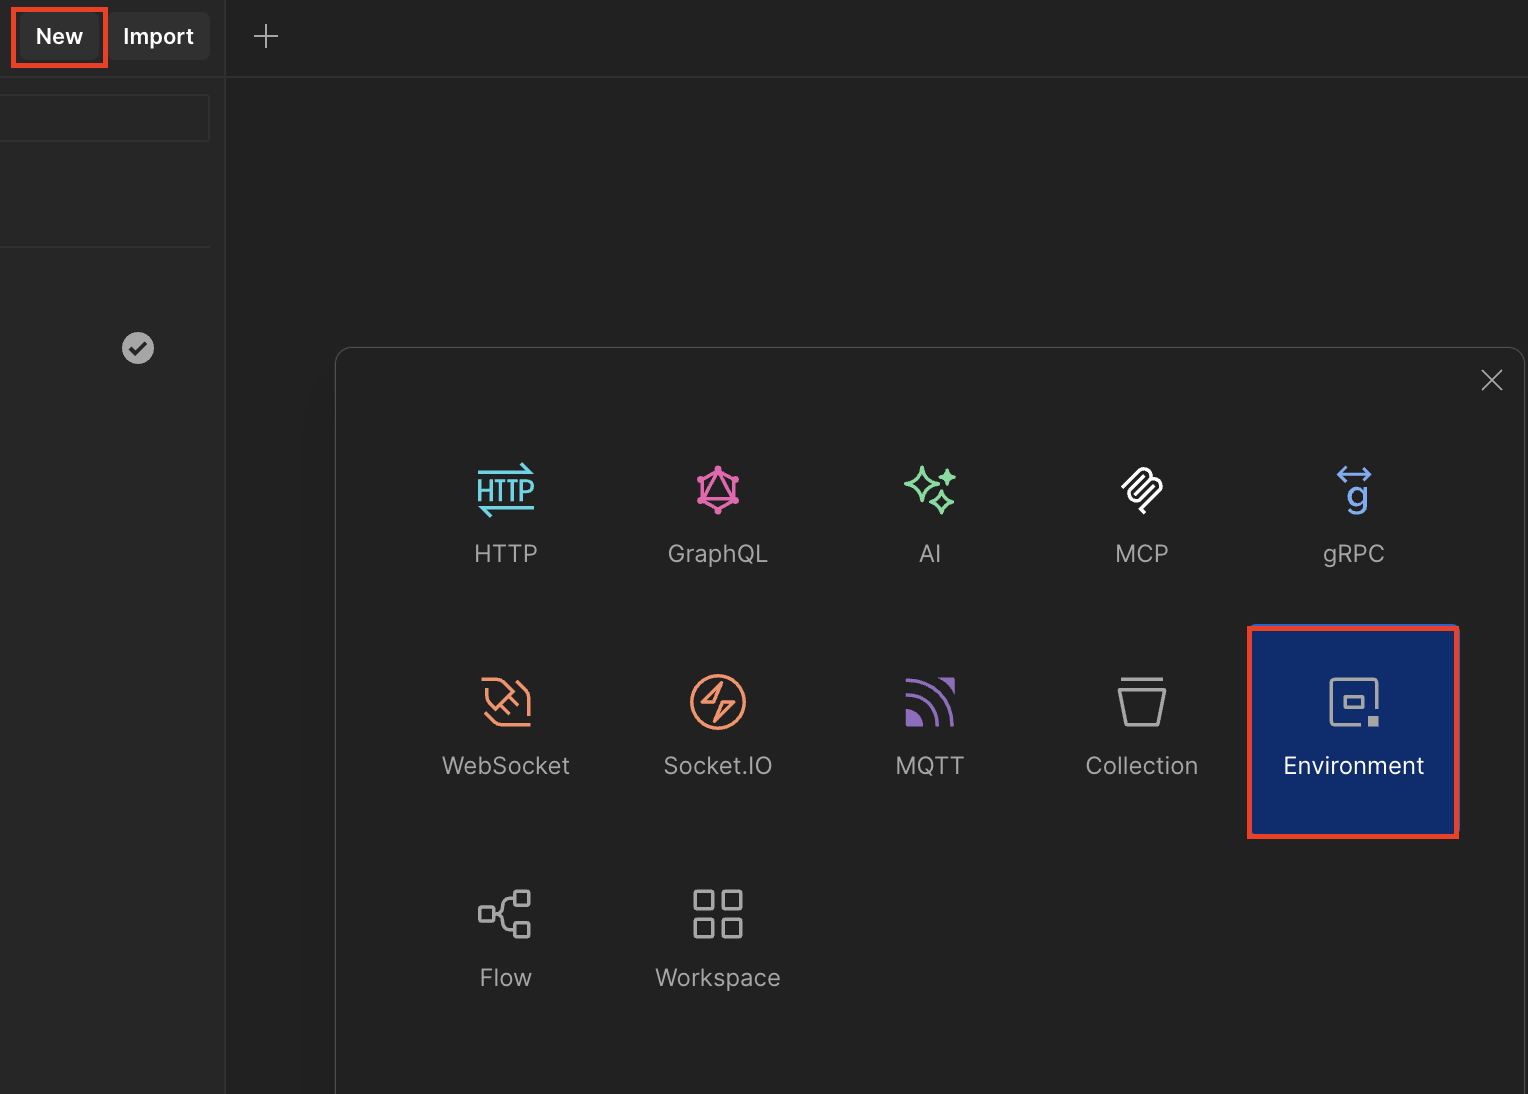
3. Name your environment (e.g., Fake Example API), and create a variable called baseUrl.
- Set both the Initial Value and Current Value with an invented url (e.g., https://api.example.com)
Step 4: Add Requests and Example Responses to the Collection
A. GET Request – Get Products
1. Inside your collection, click Add Request
2. Name it: Get Products
3. Set the method to GET
4. Invent a URL: {{baseUrl}}/products
5. Go to the Scripts tab (named “Tests” in older versions)
6. Go to Post-response and add some assertions (these are validations to ensure the response meets expectations)
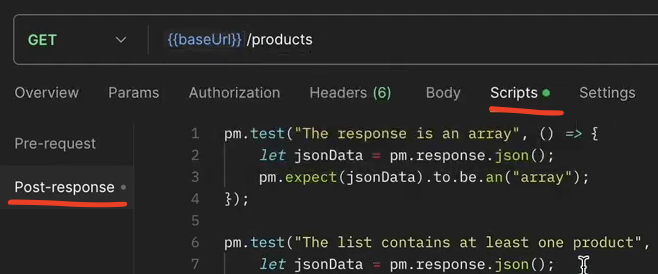
Here are some assertions examples:
pm.test("Status code is 200", function () {
pm.response.to.have.status(200);
});
pm.test("response is an array", () => {
let jsonData = pm.response.json();
pm.expect(jsonData).to.be.an("array");
});
pm.test("Every product contains the required properties", () => {
let jsonData = pm.response.json();
jsonData.forEach(producto => {
pm.expect(producto).to.have.property("id");
pm.expect(producto).to.have.property("name");
pm.expect(producto).to.have.property("price");
});
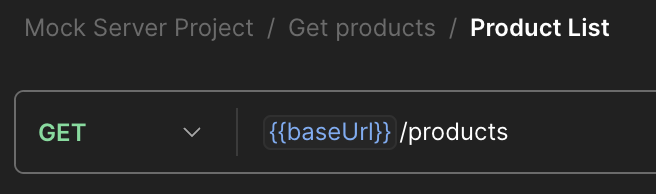
});7. Click the three-dot menu (•••) on your Get Request and select the ‘Add response’ option to create a response simulation

8. Name it: Product List

9. Set the method to GET
10. Type the same URL from the Get products request: {{baseUrl}}/products
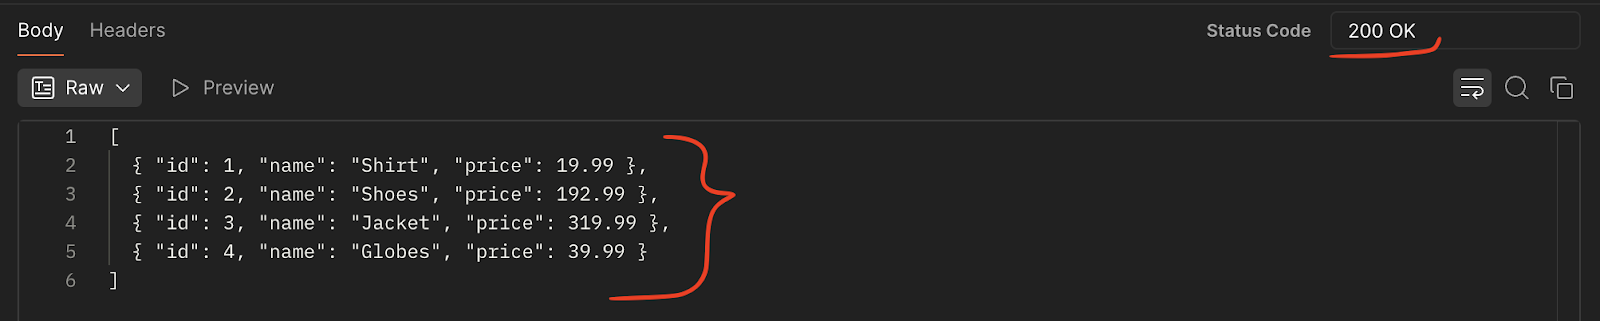
11. Create the example response:
- Add the expected response body (JSON format).
- Set the status code (e.g., 200 OK)
- Adjust headers if needed (e.g., Content-Type: application/json)

B. POST Request – Create Product
1. Add another request: Create Product
2. Set the method to POST
3. Invent a URL: {{baseUrl}}/products

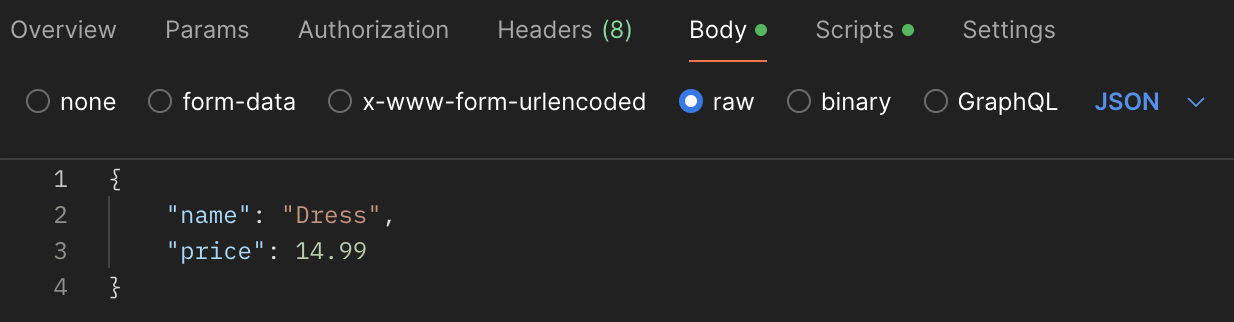
4. In the Body tab, select raw and set the format to JSON
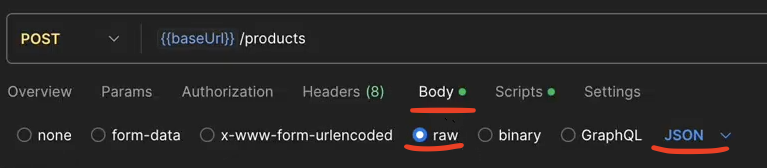
5. Add an invented JSON body to create a new product
6. In the Scripts tab >> Post-response, add assertions.Here are some examples:
pm.test("Status code is 201", function () {
   pm.response.to.have.status(201);
});

pm.test("Data from the response is correct", () => {
   let jsonData = pm.response.json();
   pm.expect(jsonData).to.have.property("id");
   pm.expect(jsonData.name).to.eql("Dress");
   pm.expect(jsonData.price).to.eql(14.99);
});
7. Click the three-dot menu (•••) on your Post Request and select the ‘Add response’ option to create a response simulation

8. Name it: Created Product
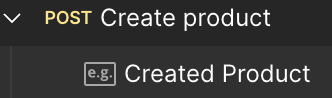
9. Set the method to POST
10. Type the same URL from the Create product request: {{baseUrl}}/products
11. Create the example response:
- Add the JSON example in the body
- Add the expected response body (JSON format)
- Set the status code (e.g., 201 Created)
- Adjust headers if needed (e.g., Content-Type: application/json)

C. PUT Request – Update Product
1. Add another request: Edit Product
2. Set the method to PUT
3. Invent a URL: {{baseUrl}}/products/5

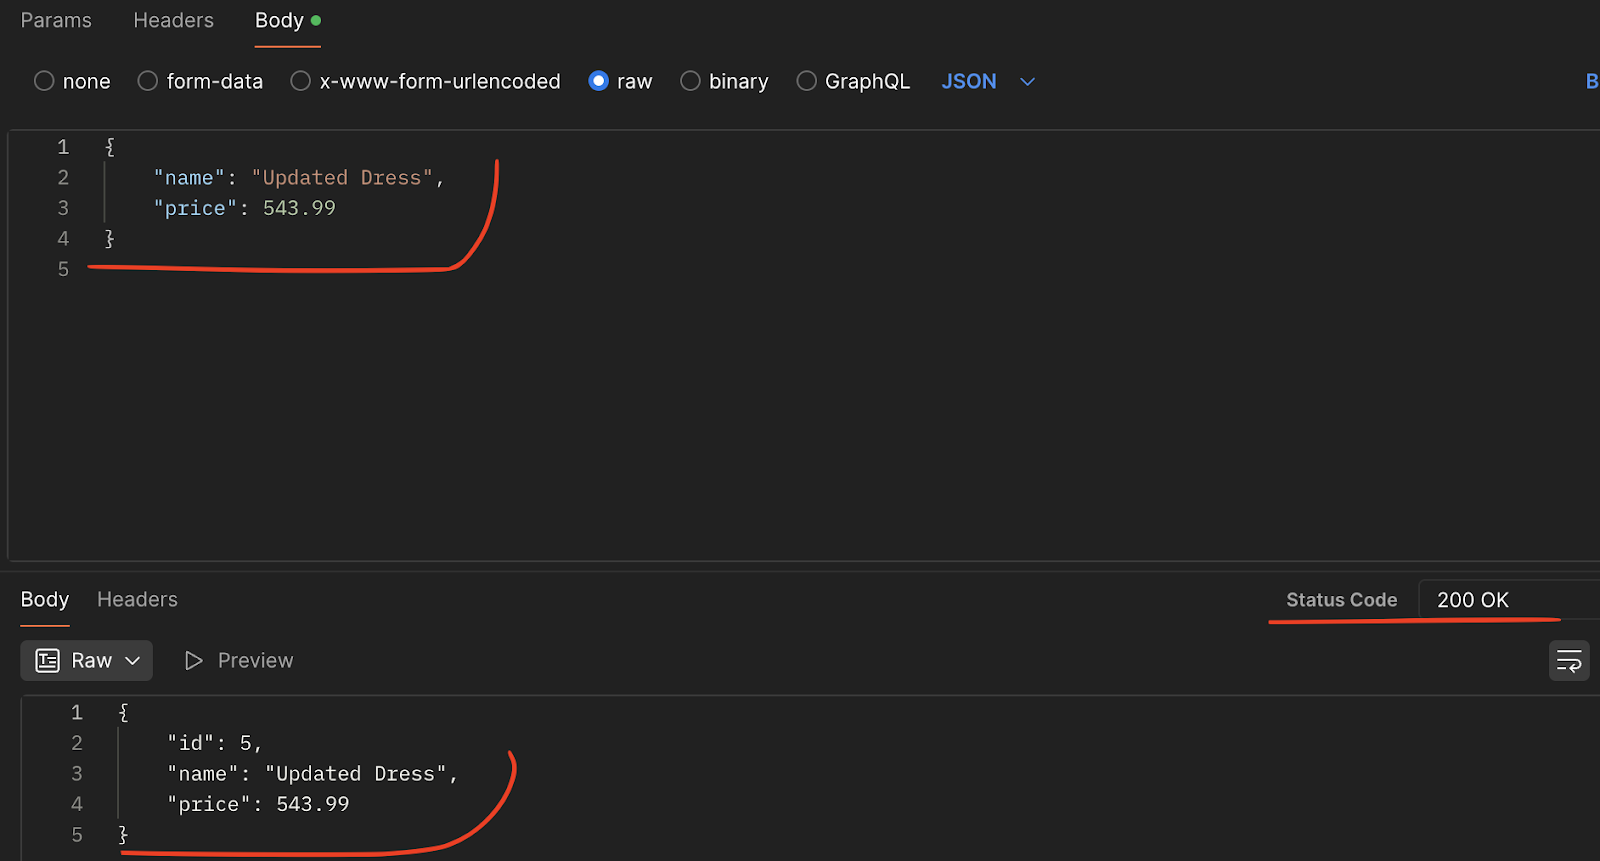
4. In the Body tab, select raw and JSON format

5. Add an invented JSON body to update a product

6. In the Scripts tab >> Post-response, add assertions. Here are some examples:
pm.test("Status code is 200", function () {
   pm.response.to.have.status(200);
});

pm.test("Product successfully updated", () => {
   let jsonData = pm.response.json();
   pm.expect(jsonData.name).to.eql("Updated Dress");
   pm.expect(jsonData.price).to.eql(543.99);
});
7. Click the three-dot menu (•••) on your Put Request and select the ‘Add response’ option to create a response simulation

8. Name it: Edited Product
9. Set the method to PUT
10. Type the same URL from the Edit product request: {{baseUrl}}/products/5

11. Create the example response:
- Add the JSON example in the body
- Add the expected response body (JSON format)
- Set the status code (e.g., 200 OK)
- Adjust headers if needed (e.g., Content-Type: application/json)
D. DELETE Request – Delete Product
1. Add another request: Delete Product
2. Set the method to DELETE
3. Invent a URL: {{baseUrl}}/products/5

4. In the Scripts tab >> Post-response, add assertions. Here is an example:
pm.test("Status code is 204", function () {
   pm.response.to.have.status(204);
});
5. Click the three-dot menu (•••) on your Delete Request and select the ‘Add response’ option to create a response simulation

6. Name it: Deleted Product
7. Set the method to Delete
8. Type the same URL from the Delete product request: {{baseUrl}}/product/5

9. Create the example response:
- Add the expected response body (JSON format)
- Set the status code (e.g., 204 No Content)
- Adjust headers if needed (e.g., Content-Type: application/json)

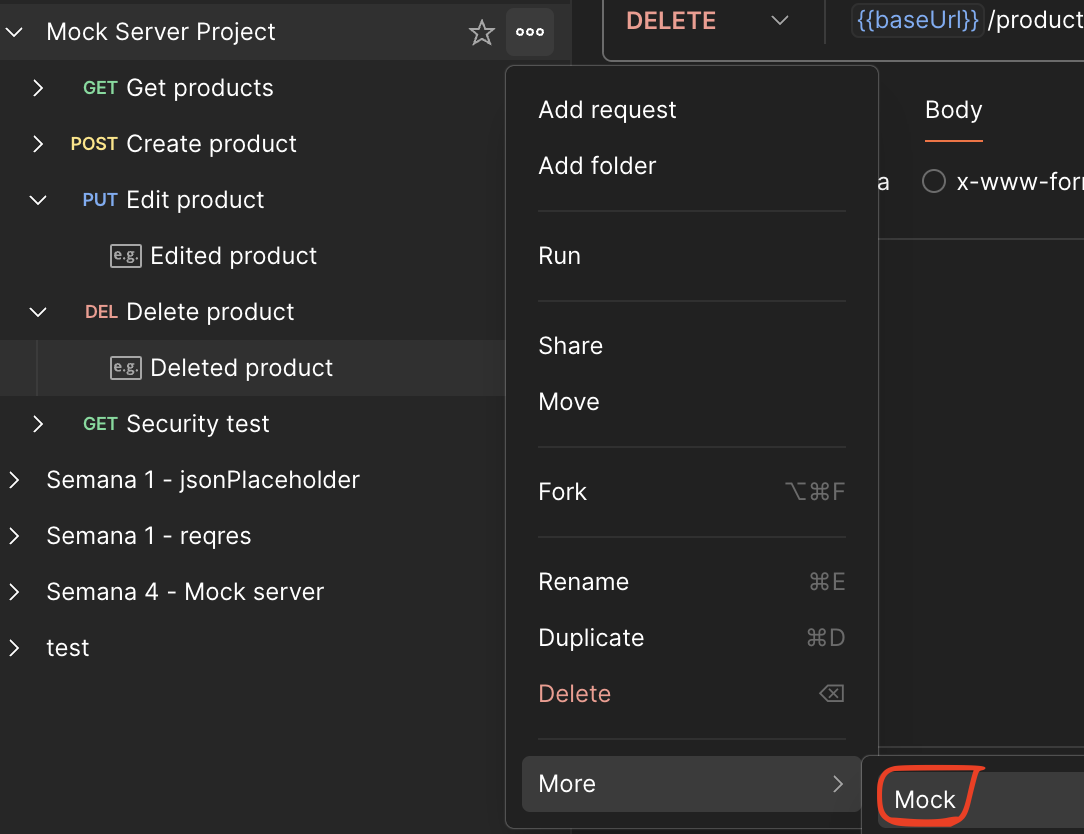
Step 5: Create the Mock Server
1. Click the three dots (…) next to your collection >> Select the Mock option.
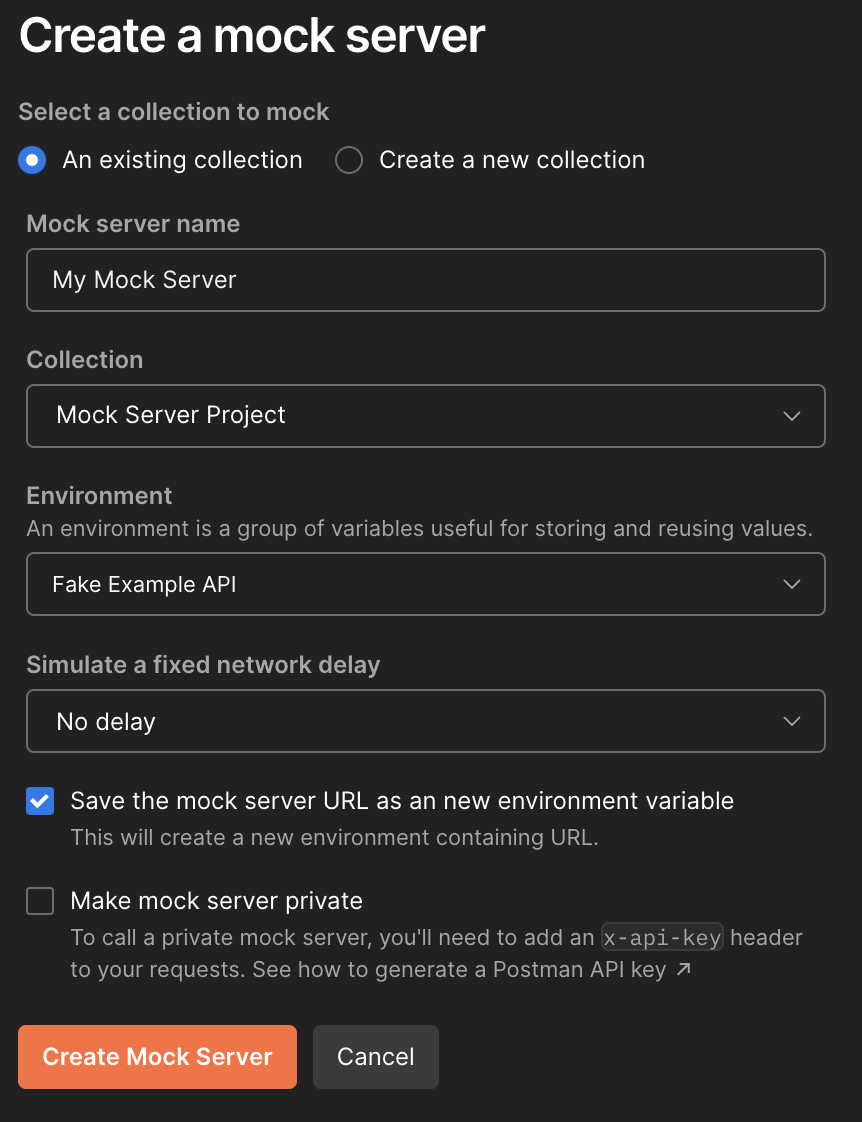
2. In the Mock Server dialog:
- Give it a name
- Select the collection you just created
- Select the environment you used in the collection
- Check ‘Save the mock server URL as a new environment variable’
- Choose whether to make the Mock Server private or public
- Click Create Mock Server
3. Postman will generate a unique Mock Server URL (e.g., https://abc123.mock.pstmn.io). This URL will be used as the base for your requests
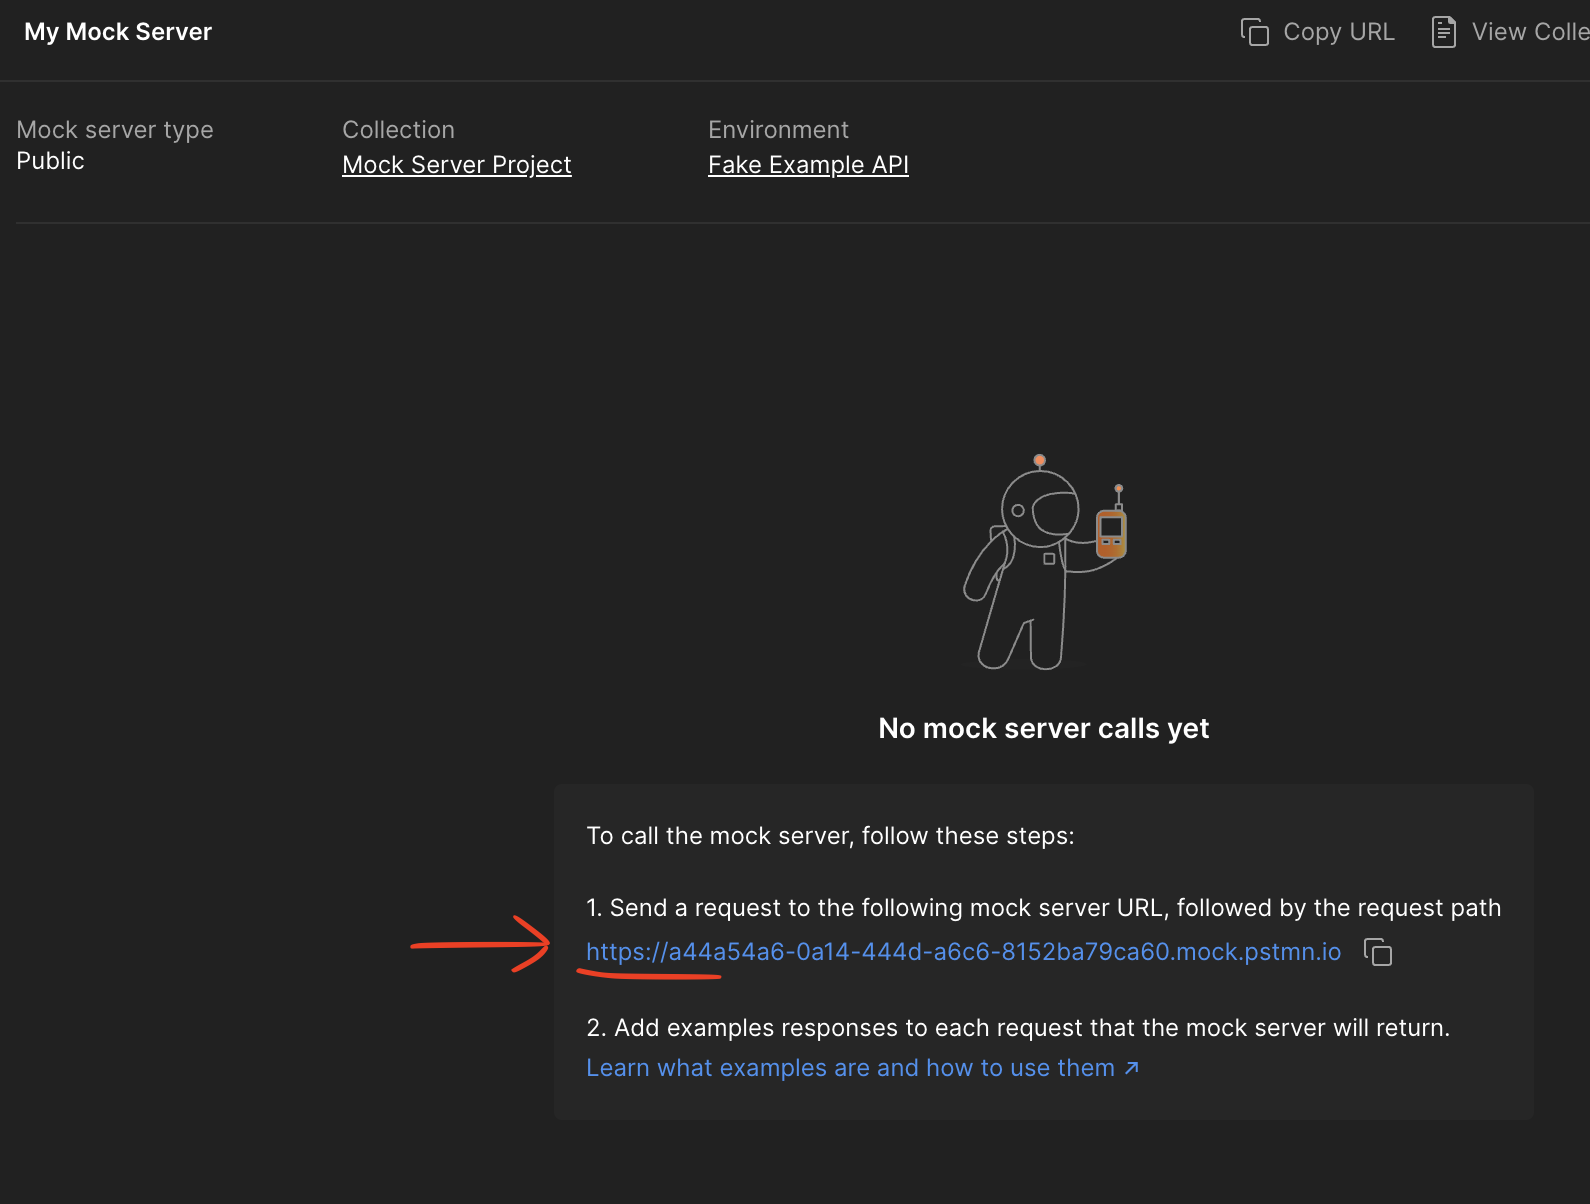
4. Go to Environments to ensure that a new environment was created with your Mock Server link and change the variable name to baseUrl

Step 6: Set The Mock Environment
1. In the top-right corner of Postman, select the environment that includes your mockServerUrl variable.

2. This ensures Postman will use the correct mock server URL when running the collection.
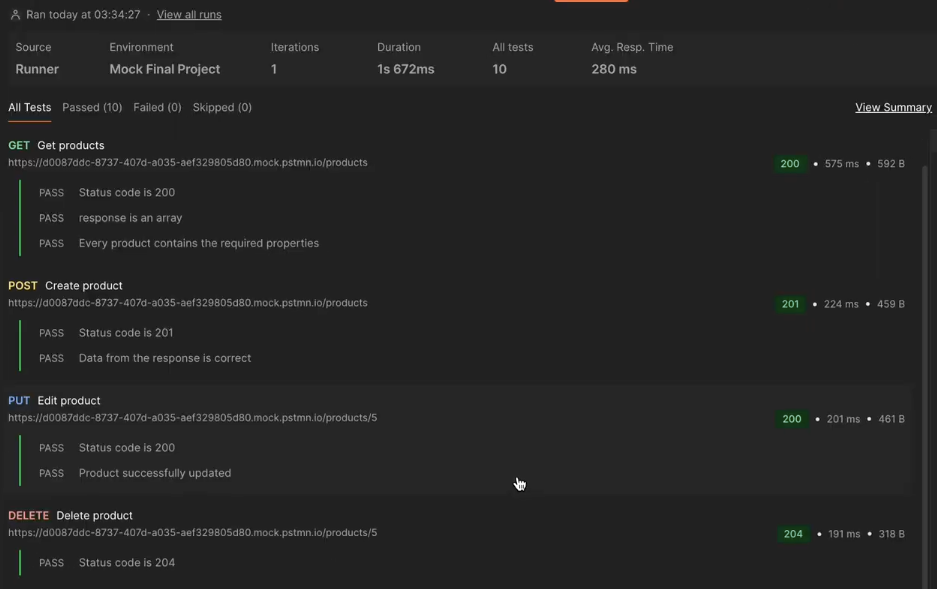
Step 7: Run your Mock Server
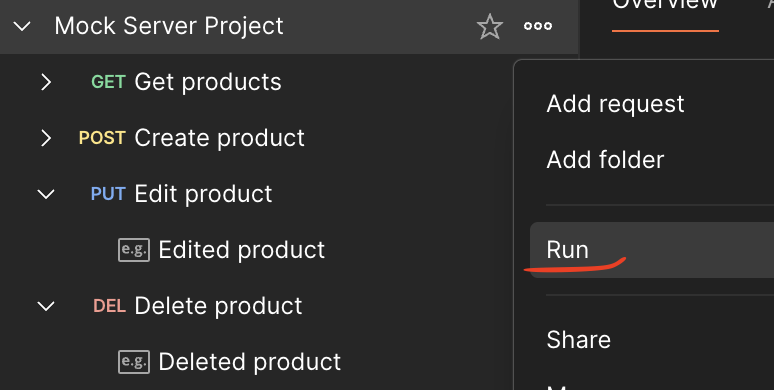
1. Click the three-dot menu (•••) on your collection and select Run.
2. Ensure that your requests are selected and make sure that your mock environment is selected in the top-right corner dropdown menu
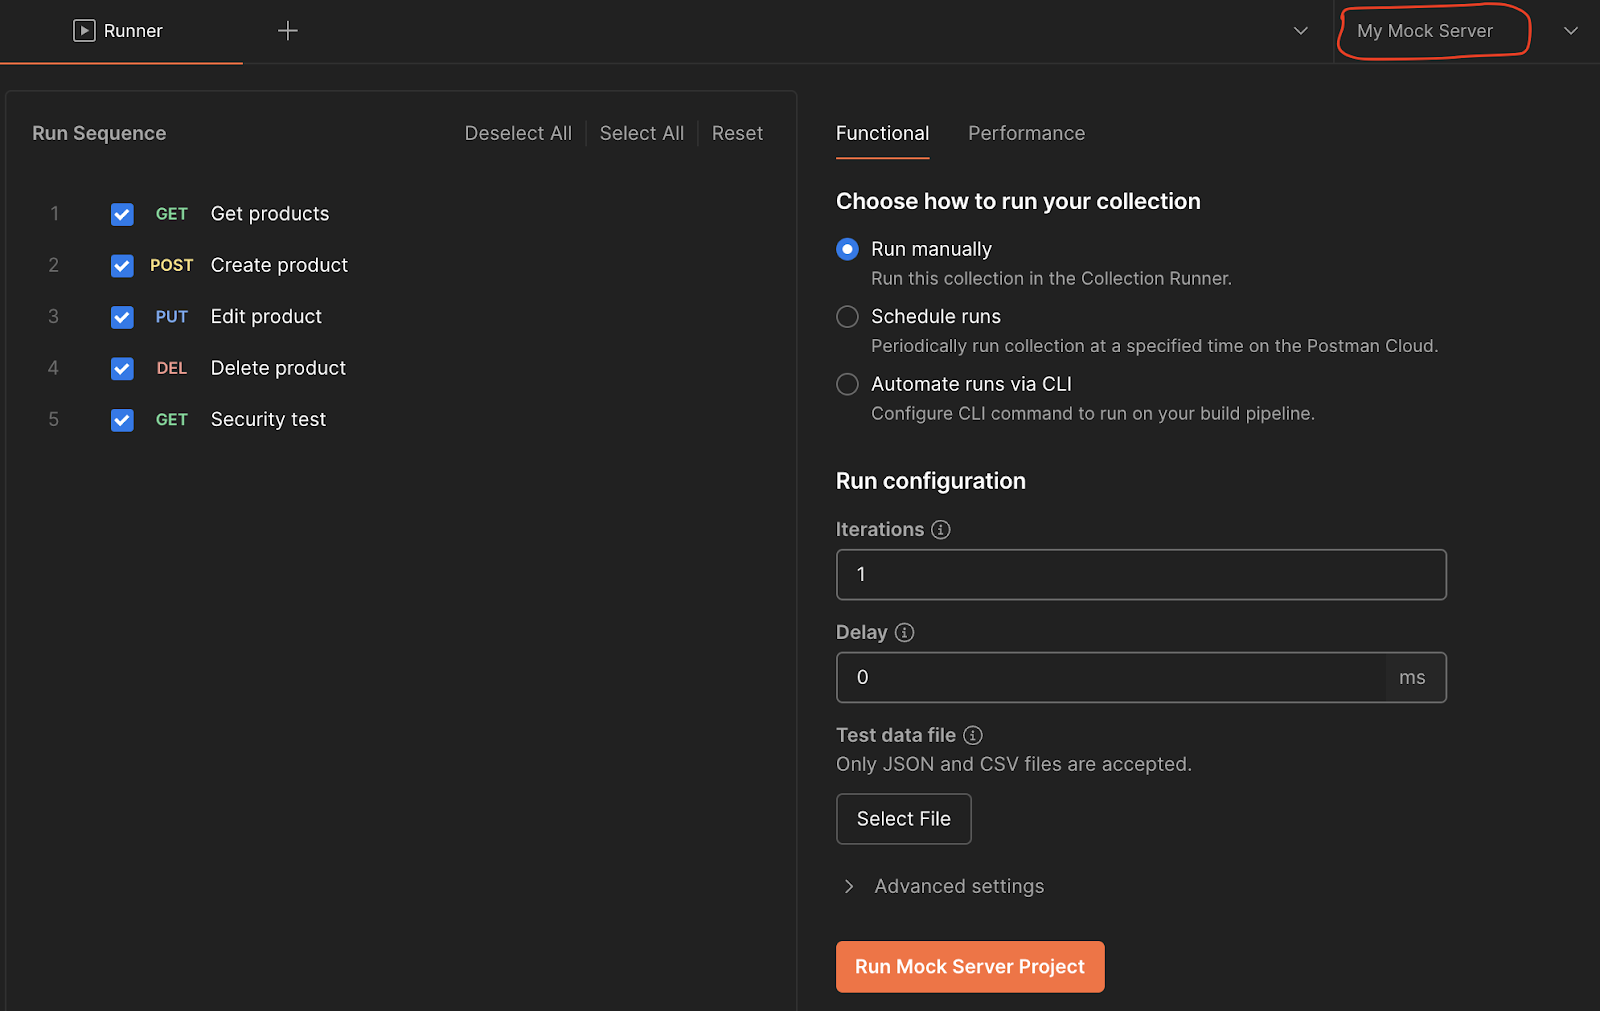
3. Click on Run your Mock Server
4. The project will run obtaining your simulated responses and results
Performance Test With Jmeter
Performance testing is a crucial aspect of software quality assurance, ensuring that applications can handle expected user loads and deliver reliable, fast responses under varying conditions. As systems scale, understanding their behavior under load becomes essential to prevent bottlenecks, downtime, and poor user experience.
Apache JMeter is one of the most popular open-source tools for performance and load testing of web applications, APIs, databases, and more. It allows testers to simulate multiple users sending requests to a target system, measure response times, and analyze system performance under different load conditions.
With JMeter, you can:
- Create realistic load tests that mimic real-world traffic
- Test APIs by sending HTTP/HTTPS requests with custom payloads and headers
- Collect and analyze performance metrics such as response times, throughput, and error rates
- Identify bottlenecks, performance degradation, and scalability issues in your system
In this guide, we will explore how to use JMeter to create a basic performance test for an API, configure test elements like HTTP Request, Thread Groups, and Listeners, and interpret the results to gain insights into your system’s performance.
Step 1: Install JMeter
1. Go to the official Apache JMeter website
2. Download the binaries (.zip or .tgz) for your OS. For example: apache-jmeter-5.6.3.zip
3. Extract the downloaded ZIP/TGZ file to a folder of your choice, e.g.: C:\jmeter\
Step 2: Install Java
1. Download Java from Oracle (JMeter needs Java 8 or higher)
2. After installation, verify with: java -version
Step 3: Launch Jmeter
1. Go to the JMeter bin folder
2. Run the jmeter script:
- Windows: Double-click jmeter.bat
- macOS/Linux: Run ./jmeter from Terminal.
3. The JMeter GUI should open
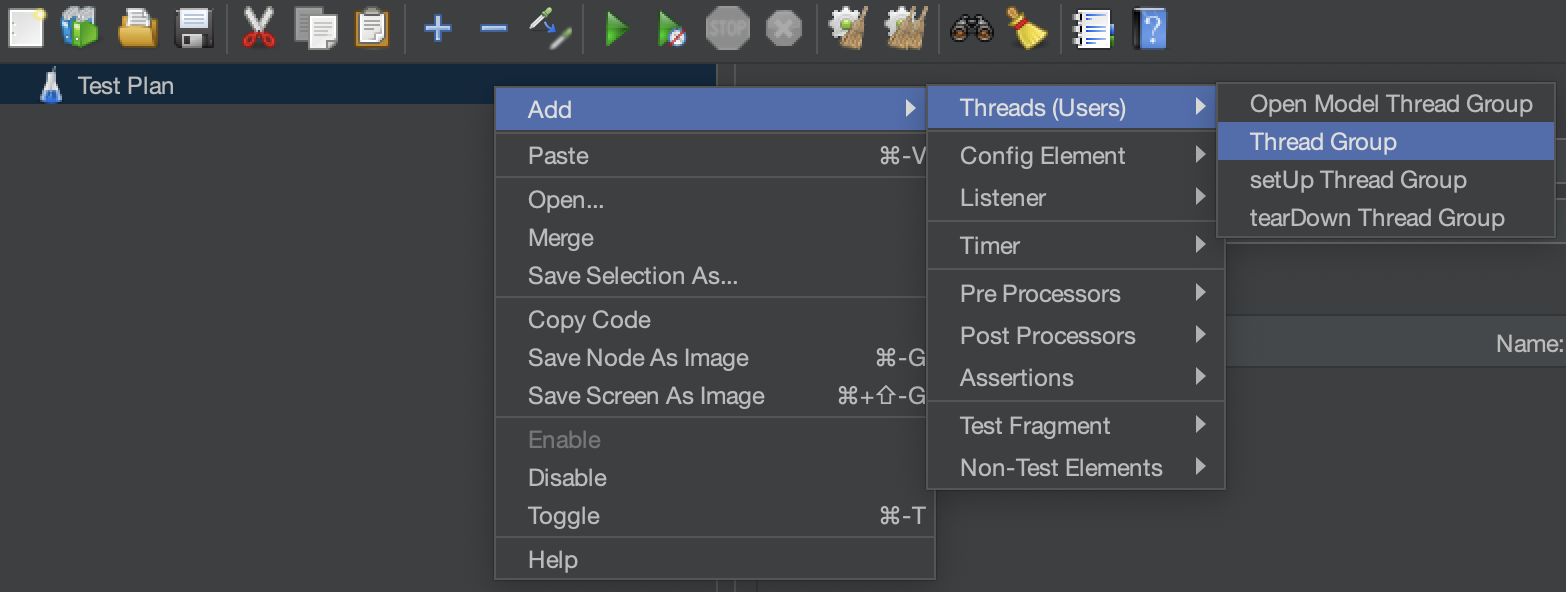
Step 4: Add a Test Plan & Thread Group
1. Test Plan (default) → right-click >> Add >> Threads (Users) >> Thread Group
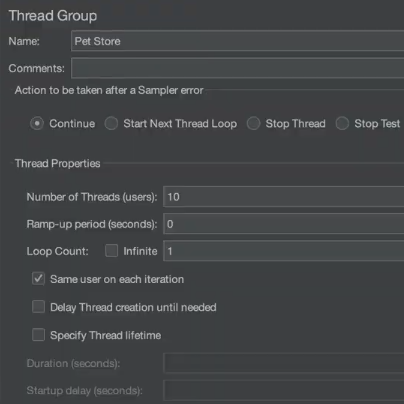
2. Configure the Thread Group:
- Give a name to the thread group
- Number of Threads (users): 10 (This is the number of users that will be sending the http request at the same time)
- Ramp-up period (seconds): 5
- Loop count: 1
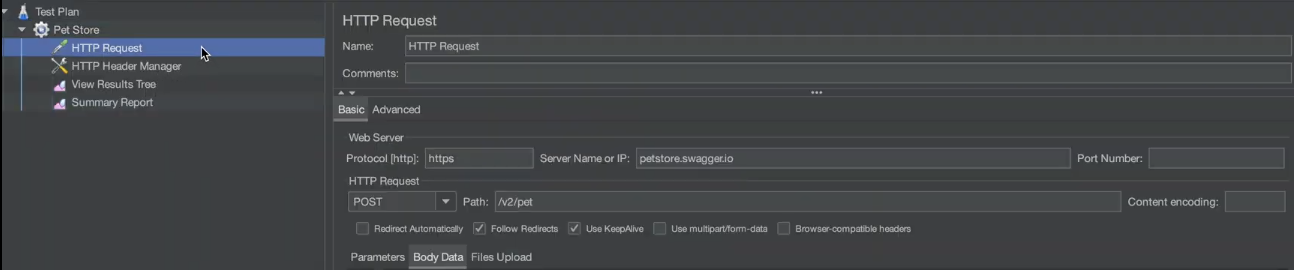
Step 5: Add an HTTP Request Sampler
1. Right-click on Thread Group >> Add >> Sampler >> HTTP Request

2. Configure the HTTP Request:
- Name: POST Pet
- Protocol: https
- Server Name or IP (This is the domain name or IP address of the server you want to send the request to): petstore.swagger.io
- Path (This is the endpoint or resource path you want to access on the server): /v2/pet
- Method: POST
Step 6: Add Request Body (JSON)
1. In the HTTP Request → go to the Body Data tab
2. Add the JSON payload:

Step 7: Add HTTP Header Manager (Content-Type)
1. Right-click on Thread Group >> Add >> Config Element >> HTTP Header Manager
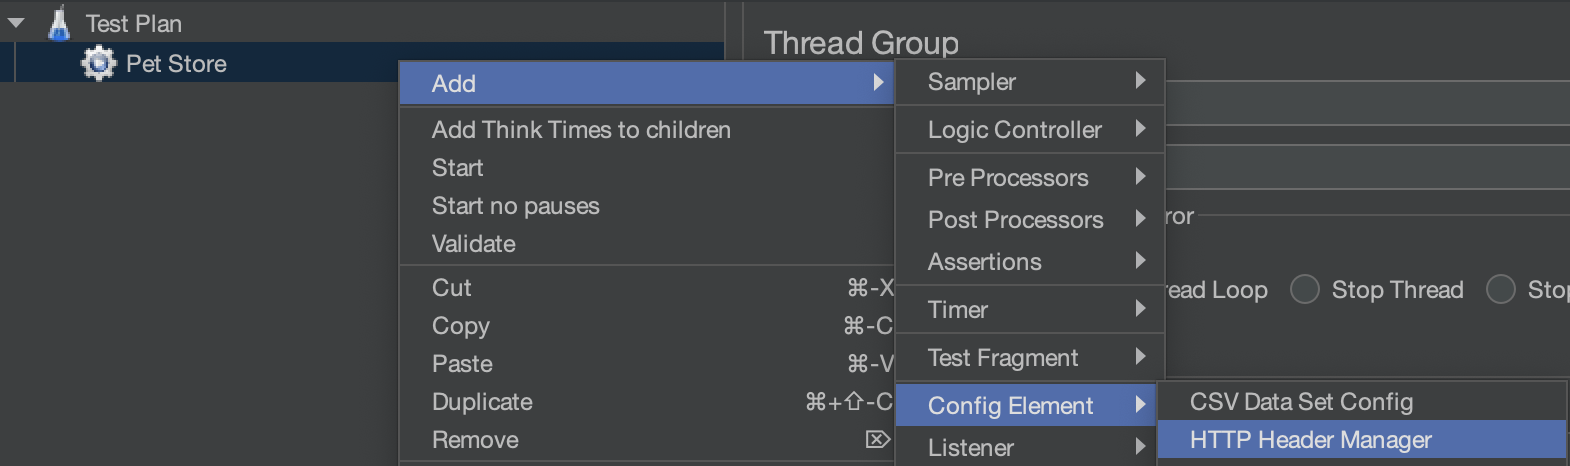
2. Click Add and set:
- Name: Content-Type
- Value: application/json

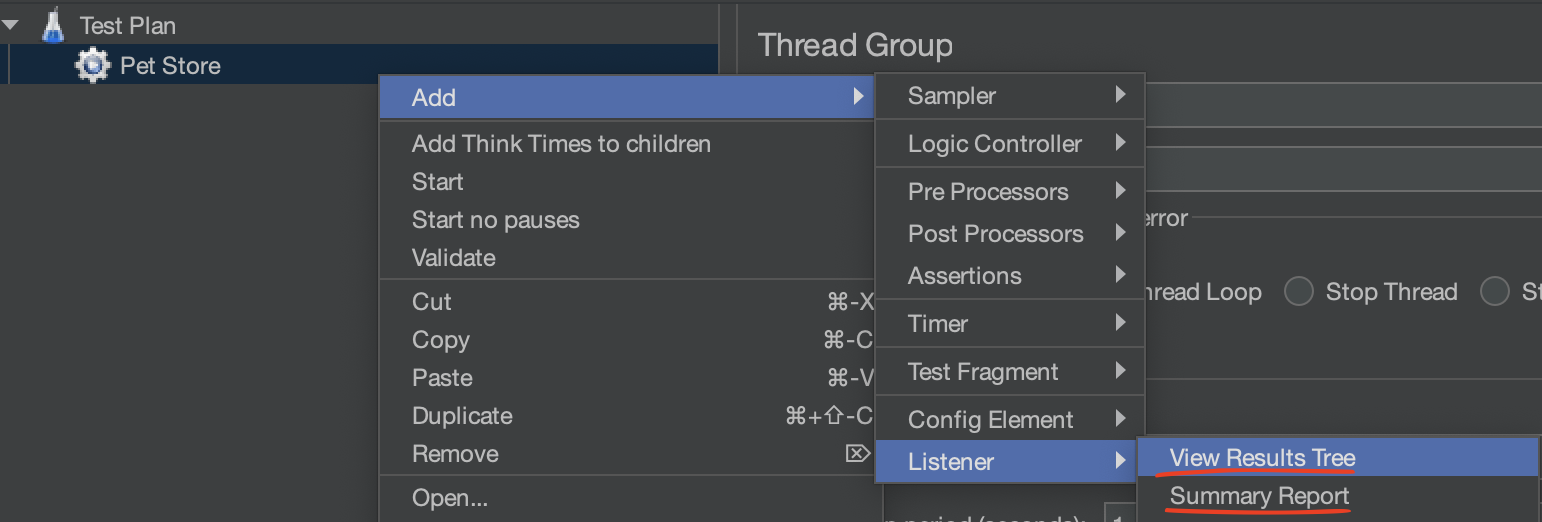
Step 8: Add Listeners
1. Right-click on Thread Group >> Add >> Listener
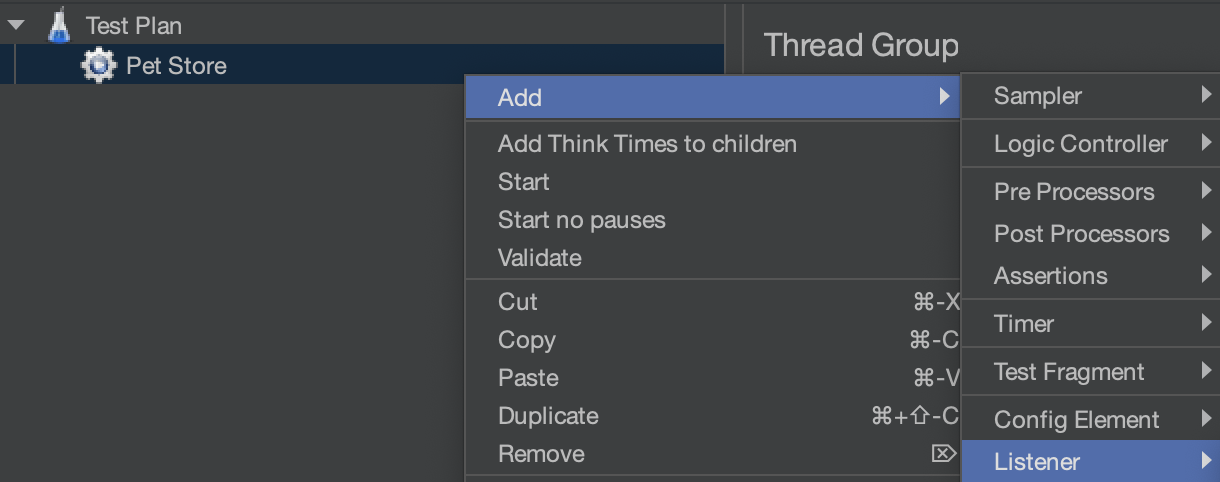
2. Add:
- View Results Tree (for debugging)
- Summary Report (for performance metrics)
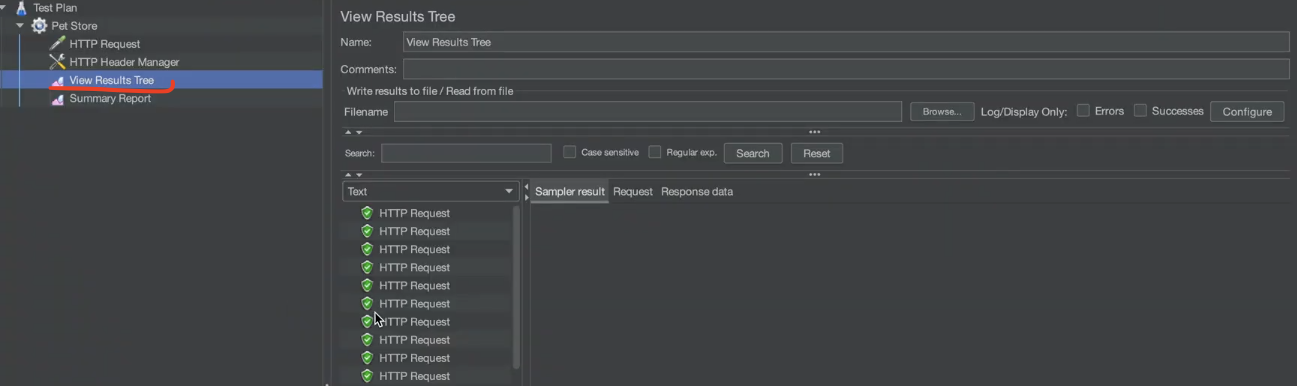
Step 9: Run the test
1. Click the green Start button on the toolbar

2. View results in:
- View Results Tree → See requests & responses
- Summary Report → Check Avg, Min, Max response times

Step 10: Save the Test Plan
1. File >> Save Test Plan As >> petstore_test.jmx
Automated Test With Supertest + Jest (Javascript)
Automated API testing is a fundamental part of software quality assurance, focusing on verifying that an application’s endpoints behave as expected. It ensures that the backend logic, data handling, and API responses meet business requirements, returning correct data and appropriate status codes under normal usage.
Supertest is a powerful HTTP assertions library for Node.js that allows you to send requests to an API and validate responses with ease. When combined with Jest, a modern JavaScript testing framework, it enables developers to write clean, readable, and maintainable tests that can be run automatically during development or integrated into continuous integration pipelines.
With Supertest and Jest, you can:
- Perform end-to-end testing of RESTful APIs using real HTTP requests
- Validate response status codes, body content, and headers
- Test CRUD operations (Create, Read, Update, Delete) across multiple endpoints
- Organize reusable test data and assert dynamic responses (e.g., created resource IDs)
- Integrate seamlessly with GitHub Actions or any CI/CD tool to automate testing on every code change
In this guide, we’ll walk through how to build a complete API test suite using Supertest and Jest. You’ll learn how to structure your project, write meaningful tests for common REST operations, and set up automation with GitHub Actions to ensure your API remains reliable, consistent, and bug-free.
Step 1: Initialize a Node.js Project
Open your terminal and create a new project directory:
mkdir api-testing
cd api-testing
npm init -y
This creates a package.json file with default values to manage your project and dependencies.
Step 2: Install Development Dependencies
Install the following tools for testing and environment variables:
npm install --save-dev jest supertest dotenv- jest – JavaScript testing framework
- supertest – HTTP assertion library for testing REST APIs
- dotenv – Loads environment variables from a .env file
Step 3: Configure the Test Script in package.json
Open package.json and add the following under “scripts”:
"scripts": {
  "test": "jest --runInBand"
}
This allows you to run all your tests using the npm test command
Step 4: Create the .env file in the root of the folder
This file will store all your sensitive information. There you need to define the API url:
API_URL=https://fakestoreapi.comThis allows you to reference the API base URL securely and flexibly inside your tests.
Step 5: Set Up the Project Folder Structure
Create the following folders and files:
api-testing/
├── tests/                       # Folder for your test files
│   └── fakeStoreApi.test.js    # Main test suite
├── testData/                   # Folder for input/output data
│   ├── newProducts.json        # Data for creating new products
│   └── createdIds.json         # Stores IDs of created products
├── .env                        # For environment variables like API base URL
├── package.json                # Project metadata and scripts
└── README.md                   # Project documentation
Step 6: Prepare Test Data for Product Creation
In testData/newProducts.json, add mock product objects that you’ll use in the POST tests:
[
 {
   "id": 0,
   "title": "Product A",
   "price": 10.5,
   "description": "Descripction A",
   "category": "category A",
   "image": "http://example.com/a.jpg"
 },
 {
   "id": 0,
   "title": "Product B",
   "price": 20.0,
   "description": "Descripction B",
   "category": "category B",
   "image": "http://example.com/b.jpg"
 }
]
You can add multiple products depending on your needs.
Step 7: Write the Test File
Create tests/fakeStoreApi.test.js and include your test cases. Here is an example:
const request = require('supertest');
const fs = require('fs');
const path = require('path');
require('./setup');

const BASE_URL = process.env.API_URL
const newProductsData = require('./testData/newProducts.json');

describe('Fake Store API - 5 test cases', () => {
 //  Case 1: GET list of products
 it('GET - list of products', async () => {
   const res = await request(BASE_URL)
     .get('/products')
     .set('Accept', 'application/json');

   expect(res.status).toBe(200);
   expect(res.headers['content-type']).toMatch(/application\/json/);
   expect(Array.isArray(res.body)).toBe(true);
   expect(res.body.length).toBeGreaterThan(0);

   res.body.forEach(product => {
       expect(product).toHaveProperty('id');
       expect(product).toHaveProperty('title');
       expect(product).toHaveProperty('price');
       expect(product).toHaveProperty('description');
       expect(product).toHaveProperty('category');
       expect(product).toHaveProperty('image');
       expect(product).toHaveProperty('rating');
       expect(product.rating).toHaveProperty('rate');
       expect(product.rating).toHaveProperty('count');
        // Additional assertions
       expect(typeof product.price).toBe('number');
       expect(product.price).toBeGreaterThan(0);
   });
 });

 //  Case 2: Add new products
 it('POST - create products y save their IDs', async () => {
   const createdIds = [];

   for (const product of newProductsData) {
     const res = await request(BASE_URL)
       .post('/products')
       .send(product)
       .set('Accept', 'application/json');

     expect(res.status).toBe(200);
     expect(res.body).toHaveProperty('id');
     expect(res.body.title).toBe(product.title);
     expect(res.body.price).toBe(product.price);
     expect(res.body.description).toBe(product.description);
     expect(res.body.category).toBe(product.category);
     expect(res.body.image).toBe(product.image);
     console.log(`Created Product: ${res.body.title}`);
     createdIds.push(res.body.id);
   }

   // Save IDs in a JSON file
   fs.writeFileSync(
     'tests/testData/createdIds.json',
     JSON.stringify(createdIds, null, 2)
   );
 });

//  Case 3: Update created product
it('PUT - Update created product', async () => {
   // Read IDs file
   const idsPath = path.join(__dirname, 'testData', 'createdIds.json');
   const createdIds = JSON.parse(fs.readFileSync(idsPath, 'utf8'));

   const firstId = createdIds[0];

   const updatedData = {
     title: "Fine Line Tattoo",
     price: 123456,
     description: "This product was updated",
     category: "updated-category",
     image: "http://example.com/updated"
   };

   const res = await request(BASE_URL)
     .put(`/products/${firstId}`)
     .send(updatedData)
     .set('Accept', 'application/json');

       expect(res.status).toBe(200);
       expect(res.body).toHaveProperty('title', updatedData.title);
       expect(res.body).toHaveProperty('price', updatedData.price);
       expect(res.body).toHaveProperty('description', updatedData.description);
       expect(res.body).toHaveProperty('category', updatedData.category);
       expect(res.body).toHaveProperty('image', updatedData.image);
       console.log('Updated Product:', res.body);
 });

 //   Case 4: Delete created product
 it('DELETE - Delete created product', async () => {
   // Read IDs file
   const idsPath = path.join(__dirname, 'testData', 'createdIds.json');
   const createdIds = JSON.parse(fs.readFileSync(idsPath, 'utf8'));

   const firstId = createdIds[0];

   const res = await request(BASE_URL)
     .delete(`/products/${firstId}`)
     .set('Accept', 'application/json');

   expect(res.status).toBe(200);
   console.log('Deleted product:', res.body);
 });

 // Case 5: Get Single Product
   it('GET - Single Product', async () => {
   const res = await request(BASE_URL)
     .get('/products/1')
     .set('Accept', 'application/json');

      expect(res.status).toBe(200);
      expect(res.headers['content-type']).toMatch(/application\/json/);

       expect(res.body).toHaveProperty('id');
       expect(res.body).toHaveProperty('title');
       expect(res.body).toHaveProperty('price');
       expect(res.body).toHaveProperty('description');
       expect(res.body).toHaveProperty('category');
       expect(res.body).toHaveProperty('image');
       expect(res.body).toHaveProperty('rating');
       expect(res.body.rating).toHaveProperty('rate');
       expect(res.body.rating).toHaveProperty('count');
        // Adittional assertions
       expect(typeof res.body.price).toBe('number');
       expect(res.body.price).toBeGreaterThan(0);
       console.log('Single Product:', res.body);
 });
});
Step 8: Run the Tests
In your terminal, execute:
npm testJest will find the .test.js files and execute the test cases.
You should see output like:
PASS  tests/fakeStoreApi.test.js
  ✓ GET - list of products
  ✓ POST - create products and save IDs
  ✓ PUT - update product
  ✓ DELETE - delete product
  ✓ GET - single product
Additional Steps: Run Tests with GitHub Actions (CI/CD)
Step 9: Create a GitHub Repository
1. Create a repository on GitHub.
2. In your terminal, link your local project:
git init
git remote add origin https://github.com/your-username/your-repo-name.git
git add .
git commit -m "Initial commit"
git push -u origin main
Step 10: Add a GitHub Actions Workflow
1. Create the directory structure:
mkdir -p .github/workflows2. Inside that folder, create a file named ci.yml (or any name you prefer):
touch .github/workflows/ci.yml3. Add the following configuration to ci.yml:
name: Run API Tests

on:
  push:
    branches: [main]
  pull_request:
    branches: [main]

jobs:
  test:
    runs-on: ubuntu-latest

    steps:
      - name: Checkout Repository
        uses: actions/checkout@v3

      - name: Set up Node.js
        uses: actions/setup-node@v4
        with:
          node-version: '18'

      - name: Install Dependencies
        run: npm install

      - name: Run Tests
        run: npm test

      - name: Upload test results (optional)
        if: failure()
        run: echo "Tests failed. Please check the logs above."
Step 11: Add GitHub secrets
The secrets will store the variables from your .env
2. 1. Go to your GitHub repo → Settings → Secrets → Actions → New repository secret
2. Add:
- Name: API_URL
- Value: https://fakestoreapi.com
3. In the ci.yml file, add:
      - name: Set environment variables
        run: echo "API_URL=${{ secrets.API_URL }}" >> $GITHUB_ENV
Step 12: Push and Trigger the Workflow
git add .
git commit -m "Add GitHub Actions workflow"
git push
GitHub will now automatically run your tests whenever you push code or open a pull request to main.
You can check the workflow runs in the “Actions” tab of your GitHub repository.
Final Thoughts
Testing your APIs is more than just checking if they work—it’s about ensuring stability, reliability, and a smooth experience for every user who depends on them.
In this guide, you’ve explored three essential tools for API testing:
- Postman for intuitive, manual testing and quick validations
- Supertest + Jest for automated, repeatable functional tests
- JMeter for simulating real-world performance and load conditions
Each tool plays a unique role in your testing strategy. Together, they help you uncover issues early, validate business logic, and ensure your APIs can scale under pressure.
As you continue building and maintaining APIs, integrating testing into your development workflow will not only improve quality—it will save time, reduce bugs, and build user trust.
Great testing is a habit, not a phase. Keep practicing, iterating, and refining your approach—and your APIs will be better for it.
If you’re new to the topic, we recommend starting with our API Testing Chapter I: Introduction to understand the fundamentals before diving into advanced tools like Postman, Supertest, and JMeter.
For a complete walkthrough on end-to-end testing for modern frontend frameworks, check out our guide on how to set up E2E testing for single-page applications.